Hi Everyone!
Its the end of the month, and has'nt September just flown out the window?! I cannot believe its nearly October already, which means only thirteen weeks til Christmas!! Sorry, had to mention it :)
Ok, so my inspiration is quite different this time. I decided to play with a few products in the shop - you know the ones; the ones you just had to have but have'nt really used yet! For me that would be Distress Inks, Stains and crackle paint.
Ive been dabbling in adhering things to glass for awhile with limited success. Besides using glossy accents or double sided tape to adhere things, I was pretty limited in what my brain was wanting me to do and what I ended up with. Then I stumbled across Rangers Glue n Seal, and this would be, in my humble opinion, the best thing ever!! It looks like a gooey curdled mess in the jar, but goes on like a dream. It paints easily onto glass, leaving it white while wet, so you can see where you're going and then dries clear. You can leave it to dry, or if you're wanting everything yesterday like me lol, then a heat gun works well too. Once your item is dry you can then paint over the top, or ink, apply rubons or whatever you like with no problem at all.
So, I had these two bottles that I'd kept for some reason or another. For the first one I kept it simple. I applied glue n seal, and then clear rock candy distress crackle paint and left it over night to dry. Then I used my spiced marmalade distress ink pad to adhere my colour and left it to dry. You can't quite see all the crackles in the photo but you can when you see it in real life.
The second bottle I painted white after using glue n seal, and then ran over it with weathered wood distress stain, and then sealed it again, before decorating it with some left over bits from my En Francais kit.
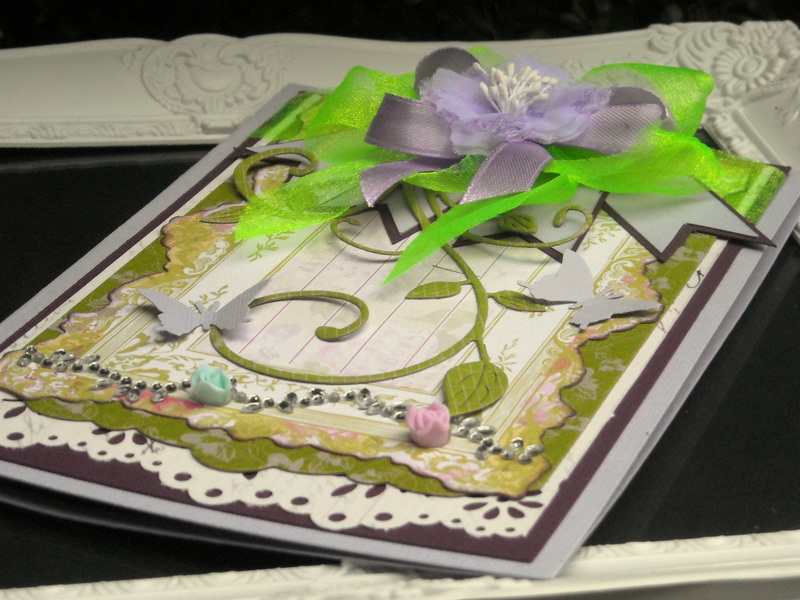
The doily behind the butterfly is an old glittered rubon from K&Co, and the rear butterfly is diecut from a Spellbinders die, layered with a Prima butterfly.
So, come on!, break out those products you just had to have and have'nt used yet and give them a go! You might surprise yourself, just like I did :)
Oh! These will be in shop on Saturday for you to have a close up look at if you wish - its all day crop at the Patch and Im hoping on getting some Christmas presents done!
Thanks for popping by!
Megan
Showing posts with label Spellbinders. Show all posts
Thursday, 27 September 2012
Thursday, 9 August 2012
OTP Inspiration
Hi Everyone,
Remember last month I showcased Basic Grey Piccadilly? Well I got a bit carried away and created something else I wanted to share with you, and its all based on scraps.
We all have them - I even have two containers for them, one for cardstock and one for patterned paper. Instead of them just becoming another collection of a collection I decided it was time to pull finger and start using them instead of giving them to the local kindy :)
Well, when I finished up my Piccadilly collection, I still had scraps and wondered for a while what I would do with them besides make a card - and then I remembered something I had bought ages and ages ago that I had done nothing with - at the time I had huge plans but never did anything about it - anyone else like that?
The item in question is a ceramic tile, its about 8x8 inches in plain white. I grabbed those scraps and made a variety of banners in different lengths, played around with their position until I was happy and then adhered - I just used my ordinary Tombow glue. Wrapped some ribbon around, added a Spellbinders butterfly and some Prima bling from my stash and a quote and I was done! The quote is a rubon from Kaisercraft and Ive transferred it to transparency and then adhered it with dimensional magic.
With the scraps from this I made my card to go with the gift. Every second star is popped up with adhesive foam for some dimension.
I promise this is the end of Picadilly :) - Hope you've enjoyed seeing the variety of ways I have played with this range, and with a bit of luck inspired you to use those scraps! :)
Thanks for popping in again!
Megan
Remember last month I showcased Basic Grey Piccadilly? Well I got a bit carried away and created something else I wanted to share with you, and its all based on scraps.
We all have them - I even have two containers for them, one for cardstock and one for patterned paper. Instead of them just becoming another collection of a collection I decided it was time to pull finger and start using them instead of giving them to the local kindy :)
Well, when I finished up my Piccadilly collection, I still had scraps and wondered for a while what I would do with them besides make a card - and then I remembered something I had bought ages and ages ago that I had done nothing with - at the time I had huge plans but never did anything about it - anyone else like that?
The item in question is a ceramic tile, its about 8x8 inches in plain white. I grabbed those scraps and made a variety of banners in different lengths, played around with their position until I was happy and then adhered - I just used my ordinary Tombow glue. Wrapped some ribbon around, added a Spellbinders butterfly and some Prima bling from my stash and a quote and I was done! The quote is a rubon from Kaisercraft and Ive transferred it to transparency and then adhered it with dimensional magic.
With the scraps from this I made my card to go with the gift. Every second star is popped up with adhesive foam for some dimension.
I promise this is the end of Picadilly :) - Hope you've enjoyed seeing the variety of ways I have played with this range, and with a bit of luck inspired you to use those scraps! :)
Thanks for popping in again!
Megan
Saturday, 14 July 2012
A month of Basic Grey - Part 2
Hi Everyone!
Well, this time I thought I'd do something quite different and not something Ive done before, so it was a bit of an experiment. Throw in that I wanted to something for a little boy and it became more than a little challenging, after all you know what me and flowers are like :)
The reason for the boy theme was because Im about to become, well in October anyway, a Great Aunt! An aunt would be fine, but heavens a great aunt sounds so old! My niece is in her mid twenties and its all exciting, so I have been thinking of decorating babys' room ideas. Actually I was thinking of lovely girly things, and then he turned into a boy! So, I got thinking a bit more and decided to turn my lovely bright Picadilly orange papers into a lampshade.
I purchased an ordinary touch lamp with a plain canvas lamp shade in a sale, and set about turning it into something a bit more interesting.
So how did we get to this point? Easy peasy. Decide what theme you want first - I chose stars - and then randomly diecut a mixture of sizes and colours.
Then its just a matter of playing with placement....................................................
Once I was happy with placement, they needed something else, so I added buttons and twine for finishing touches, and it was done!
Well, this time I thought I'd do something quite different and not something Ive done before, so it was a bit of an experiment. Throw in that I wanted to something for a little boy and it became more than a little challenging, after all you know what me and flowers are like :)
The reason for the boy theme was because Im about to become, well in October anyway, a Great Aunt! An aunt would be fine, but heavens a great aunt sounds so old! My niece is in her mid twenties and its all exciting, so I have been thinking of decorating babys' room ideas. Actually I was thinking of lovely girly things, and then he turned into a boy! So, I got thinking a bit more and decided to turn my lovely bright Picadilly orange papers into a lampshade.
I purchased an ordinary touch lamp with a plain canvas lamp shade in a sale, and set about turning it into something a bit more interesting.
So how did we get to this point? Easy peasy. Decide what theme you want first - I chose stars - and then randomly diecut a mixture of sizes and colours.
Then its just a matter of playing with placement....................................................
Once I was happy with placement, they needed something else, so I added buttons and twine for finishing touches, and it was done!
The paper I used was still part of the Picadilly range, specifically Eat at Jones, Eggs & Bacon, and Farm Fresh Eggs, with a piece of Bazzill cardstock. The buttons were from the range too.
Thanks for stopping by!
Megan
Saturday, 19 May 2012
A book, a card and tutorial
Hi Everyone!
Today I have the glorious Meadow Lark Collection to show you, specifically their notecard set - 30 cards in total with five different designs, which makes them pretty good value for money. Ive never used the entire collection before though, usually Ive purchased the mini packs and used them in layouts or cards, but this time I set myself a bit of challenge to see what I could come up with using the entire set!
Well, what better idea than to make a birthday book! I intended this wee book to be a gift for someone we all know, who's just celebrated a birthday :) - if you happen to be scrapping up a storm tomorrow in the shop she might just let you see it!
The front and back covers are made from thick chipboard and covered with some old Prima from my stash, inked in Pinecone and decorated with seam binding ribbon, Martha Stewart deep edge punch and Prima heart. Ive used rings along the top to bring the whole thing together. Each page is made with Prima packaging either one of the old green ones or the newer floral ones - it pays to keep them, they come in very handy :) ! For each 'page' I adhered a notecard front and back, and decorated it, or adhered a page of dates. Heres a few of my favourite ones:-
Because there are twelve pages to the book, I needed to make sure each page didn't have too many dimensional embellishments, so I used lots of lace, Green Tara and Manor House flowers, edge punches and Spellbinders dies, to decorate each side of the page.
With the scraps I made a birthday card and a tag :-
With the tag Ive stamped on the background using one of Prima's new stamps, using Versamark ink. One of the great things about using Versamark is that it does three things - you can use it to emboss, to adhere powder, like Pearlex or to create a watermark effect, or in other words, when you use it to stamp onto a light coloured cardstock it turns out a darker shade of that cardstock. Like this:
then I just decorated the tag with lace, one of the remaining notecards, some of the new Prima bling and my favourite Spellbinders die - check out that butterfly! :))
Did you spy any of those new Manor House flowers? If you did, comment which one they are and you could win a small collection of them and the new Prima Stamp Ive used.
Happy Scrapping Everyone!
Megan
Today I have the glorious Meadow Lark Collection to show you, specifically their notecard set - 30 cards in total with five different designs, which makes them pretty good value for money. Ive never used the entire collection before though, usually Ive purchased the mini packs and used them in layouts or cards, but this time I set myself a bit of challenge to see what I could come up with using the entire set!
Well, what better idea than to make a birthday book! I intended this wee book to be a gift for someone we all know, who's just celebrated a birthday :) - if you happen to be scrapping up a storm tomorrow in the shop she might just let you see it!
The front and back covers are made from thick chipboard and covered with some old Prima from my stash, inked in Pinecone and decorated with seam binding ribbon, Martha Stewart deep edge punch and Prima heart. Ive used rings along the top to bring the whole thing together. Each page is made with Prima packaging either one of the old green ones or the newer floral ones - it pays to keep them, they come in very handy :) ! For each 'page' I adhered a notecard front and back, and decorated it, or adhered a page of dates. Heres a few of my favourite ones:-
Because there are twelve pages to the book, I needed to make sure each page didn't have too many dimensional embellishments, so I used lots of lace, Green Tara and Manor House flowers, edge punches and Spellbinders dies, to decorate each side of the page.
With the scraps I made a birthday card and a tag :-
With the tag Ive stamped on the background using one of Prima's new stamps, using Versamark ink. One of the great things about using Versamark is that it does three things - you can use it to emboss, to adhere powder, like Pearlex or to create a watermark effect, or in other words, when you use it to stamp onto a light coloured cardstock it turns out a darker shade of that cardstock. Like this:
then I just decorated the tag with lace, one of the remaining notecards, some of the new Prima bling and my favourite Spellbinders die - check out that butterfly! :))
Did you spy any of those new Manor House flowers? If you did, comment which one they are and you could win a small collection of them and the new Prima Stamp Ive used.
Happy Scrapping Everyone!
Megan
Labels:
Green Tara,
Martha Stewart Punches,
Meadow Lark,
prima,
Spellbinders
Saturday, 7 April 2012
Easter OTP Inspiration
Hi Everyone!
April seems to have arrived soooo quickly!, and its Easter already. Hopefully not all of you have to work over the holiday period, and will have time to spend with family and of course scrap all those photos you're bound to take this weekend :)
A lot people I know plan Easter egg hunts around their property, to create a bit of fun and excitement for their little ones, and with that in mind I decorated a old paint tin I had lying around - it actually used to hold loads of prima flowers, but I kept hold of it thinking it would come in handy for something! I have seen these in the craft aisle at The Warehouse - writing this I seem to have a habit of going there for bits to scrap :)
Ive decorated the whole tin in Prima Celebrations paper - I wanted something Easter themed and this was perfect. Even though its from last season, who cares when it looks so good lol. (Theres still some in the shop I have'nt taken all of it lol.) For the bow I cut the strips I needed and distressed the edges, then I sprayed them with water and screwed them up in balls. Spread them out again and and played with them until I had the shape of my bow that I wanted, and waited for them to dry. Ive attached the paper bow with double sided tape and my trusty hot glue gun.
On the lid I created my garden for the Easter egg hunt with a Prima vine and resin bridge. The little people, chickens and rabbit are cut from the designs on the paper. Everything has been hot glued on, and the lid still comes off to fill the tin with your wonderful stash of Easter eggs.
The card is made from scraps left over using three different Spellbinders dies for layering - Labels Twenty Three, Lacey Ovals and Large Classic Ovals. Behind the seam binding triple bow is a Martha Stewart punch.
Happy Easter everyone!
Megan
April seems to have arrived soooo quickly!, and its Easter already. Hopefully not all of you have to work over the holiday period, and will have time to spend with family and of course scrap all those photos you're bound to take this weekend :)
A lot people I know plan Easter egg hunts around their property, to create a bit of fun and excitement for their little ones, and with that in mind I decorated a old paint tin I had lying around - it actually used to hold loads of prima flowers, but I kept hold of it thinking it would come in handy for something! I have seen these in the craft aisle at The Warehouse - writing this I seem to have a habit of going there for bits to scrap :)
Ive decorated the whole tin in Prima Celebrations paper - I wanted something Easter themed and this was perfect. Even though its from last season, who cares when it looks so good lol. (Theres still some in the shop I have'nt taken all of it lol.) For the bow I cut the strips I needed and distressed the edges, then I sprayed them with water and screwed them up in balls. Spread them out again and and played with them until I had the shape of my bow that I wanted, and waited for them to dry. Ive attached the paper bow with double sided tape and my trusty hot glue gun.
On the lid I created my garden for the Easter egg hunt with a Prima vine and resin bridge. The little people, chickens and rabbit are cut from the designs on the paper. Everything has been hot glued on, and the lid still comes off to fill the tin with your wonderful stash of Easter eggs.
The card is made from scraps left over using three different Spellbinders dies for layering - Labels Twenty Three, Lacey Ovals and Large Classic Ovals. Behind the seam binding triple bow is a Martha Stewart punch.
Happy Easter everyone!
Megan
Monday, 19 December 2011
Christmas Ornaments
Hi everyone!
I wanted to show you this very cool Christmas decoration I whipped up. The original idea is not one of my own. I first saw them on www.2gypsygirls.com last year and then they popped up again in Stamping and Papercraft magazine, Vol 16 no 8. I had wanted to make them last year but just ran out of time, but this year I was determined to give them a crack!
Heres my two decorations and then I will write up the basic instructions to complete them.
Ok, so first of all Ive just used left over scraps of paper to make the strips, and the layered poinsettia flowers. Ive added a glass decoration I found at the Warehouse and layered some glittered chipboard snowflakes I had in stash, from Kay & Co, to decorate.
Basic instructions:
Cut x7 20mm wide strips out of double sided patterned paper, and then trim them to the following lengths. You could use a variety of different papers or keep them all the same.
One strip 100mm long
Two strips 115mm long
Two strips 130mm long
Two strips 140mm long
Ink the edges of all strips now if desired.
Arrange the paper strips so they descend inwards in size, with the largest two pieces on the outside edges and the smallest in the middle.
Line up all the strips at one end and staple them together. Then line them up at the other end and staple these together too - this gives the curved effect.
Trim two 40 x 20mm strips of co-ordinating paper and fold them in half. Trim the short ends with scalloped scissors. Affix these over the top and bottom of the ornaments to hide the staples.
Set an eyelet in the top of the ornament OR just punch a hole through like I did and hide it with ribbon :), if like me you don't have eyelets.
Feed ribbon or wire through the hole you have created to hang your ornament.
Now decorate as desired!
Heres some closeups of my two examples:
Happy scrapping everyone! and Merry Christmas!
Megan
I wanted to show you this very cool Christmas decoration I whipped up. The original idea is not one of my own. I first saw them on www.2gypsygirls.com last year and then they popped up again in Stamping and Papercraft magazine, Vol 16 no 8. I had wanted to make them last year but just ran out of time, but this year I was determined to give them a crack!
Heres my two decorations and then I will write up the basic instructions to complete them.
Ok, so first of all Ive just used left over scraps of paper to make the strips, and the layered poinsettia flowers. Ive added a glass decoration I found at the Warehouse and layered some glittered chipboard snowflakes I had in stash, from Kay & Co, to decorate.
Basic instructions:
Cut x7 20mm wide strips out of double sided patterned paper, and then trim them to the following lengths. You could use a variety of different papers or keep them all the same.
One strip 100mm long
Two strips 115mm long
Two strips 130mm long
Two strips 140mm long
Ink the edges of all strips now if desired.
Arrange the paper strips so they descend inwards in size, with the largest two pieces on the outside edges and the smallest in the middle.
Line up all the strips at one end and staple them together. Then line them up at the other end and staple these together too - this gives the curved effect.
Trim two 40 x 20mm strips of co-ordinating paper and fold them in half. Trim the short ends with scalloped scissors. Affix these over the top and bottom of the ornaments to hide the staples.
Set an eyelet in the top of the ornament OR just punch a hole through like I did and hide it with ribbon :), if like me you don't have eyelets.
Feed ribbon or wire through the hole you have created to hang your ornament.
Now decorate as desired!
Heres some closeups of my two examples:
Happy scrapping everyone! and Merry Christmas!
Megan
Monday, 12 December 2011
Hi Everyone! Merry Christmas to you all!
If you're like me and love altering, well anything :) you would always be on the hunt for something to revamp! In my scrap room I have a cupboard filled with quite a few alterable items, well more than a few if the truth be told hehe, but they do come in handy!
Maya Road Tins anyone? You know the ones, came out ages ago filled with chipboard items like arrows, flourishes stars etc. Well I still had a few that needed reinventing. This one Ive decorated with the scraps from my DT kit using Websters Pages Western Romance - such a lovely range, sigh.
To decorate the sides of the tin Ive cut straight strips of paper and then punched the edges with a Martha Stewart punch and then added some ribbon tape. On the top Ive done a triple bow with seam binding ribbon. On the front Ive used layers of paper cut using Spellbinders Picot Edge Circles and Labels Twenty Two. Ive also used the paper motifs as an embellishment, cutting the hat so that my 'letters' looks like they're tucked inside - Ive popped this whole thing up with foam tape, and then just added some flowers, cameo and a pin.
So there you go, quick and easy, did'nt take long at all and makes the perfect gift filled with some yummy treats.
Happy Scrapping!
Megan
If you're like me and love altering, well anything :) you would always be on the hunt for something to revamp! In my scrap room I have a cupboard filled with quite a few alterable items, well more than a few if the truth be told hehe, but they do come in handy!
Maya Road Tins anyone? You know the ones, came out ages ago filled with chipboard items like arrows, flourishes stars etc. Well I still had a few that needed reinventing. This one Ive decorated with the scraps from my DT kit using Websters Pages Western Romance - such a lovely range, sigh.
To decorate the sides of the tin Ive cut straight strips of paper and then punched the edges with a Martha Stewart punch and then added some ribbon tape. On the top Ive done a triple bow with seam binding ribbon. On the front Ive used layers of paper cut using Spellbinders Picot Edge Circles and Labels Twenty Two. Ive also used the paper motifs as an embellishment, cutting the hat so that my 'letters' looks like they're tucked inside - Ive popped this whole thing up with foam tape, and then just added some flowers, cameo and a pin.
So there you go, quick and easy, did'nt take long at all and makes the perfect gift filled with some yummy treats.
Happy Scrapping!
Megan
Subscribe to:
Posts (Atom)