Showing posts with label francine. Show all posts

Thursday, 10 November 2011

Product Focus- Putting on the Glitz with Glitz Glitzers

Hi Everyone. This week i wanted to share a layout that i did recently using the gorgeous Glitz Designs- Glitzers. They are truly gorgeous and would be lovely not only on layouts but cards also...They are transparent with diamond bling on the pictures or around the words and each new range of Glitz designs has their own matching embeliishments. They would be very easy to mix and match with other ranges of papers too - particualrly if you like the shabby vintage style.

Sadly my mojo has been terribly lacking over the last few weeks- i think that i am in a bit of a rut with my scrapbooking so i was delighted to find MIss Arts Papercrafting school. If you haven't checked them out yet- then you must! What a fabulous fabulous site! They run classes online- 3 at a intermediate level per month and three at a more advanced level for only $5-10 US per month. each class is taught by an internationally renowned tutor- and has a series of videos for you to follow to create with them. They are very technique based and they create their layout in front of you!

Every few months they have a free class- i recently did a Stacey Cohen class and last weekend they ran another free class by Julie Winks- wow was this class chocka full of technique - 12 videos!!! Anyhoo- since i was feeling that my layouts were abit samey i decided to give this a go- mine still looks very average next to hers but i loved trying some new techniques- masking- painting, chipboard distressing- using a Tim Holtz die that i hadn't used yet and her fabulous "nests:. Please check out Julie's blog for more of her wonderful work
Julie Winks Blog and also
Miss Arts Papercrafting School

Anyhoo this is the layout that i did based on this class


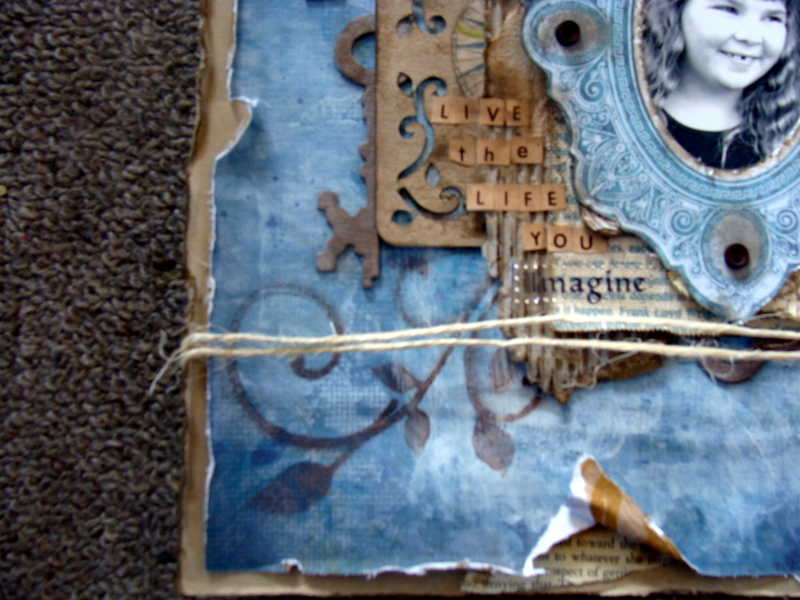
A close up of one of the Glitzers

Close up showing some of the masking and all those layers and textures

Tim Holtz dies

Using my new banner punch - love it!

 I hope that you will try the Glitzers- they are perfect for that extra special touch and so versatile no matter what paper ranges that you are using..

Also have a peek at the Miss Arts site for learning lots of new techniques

Happy Scrapping

Francine

Products Used
Glitz Designs- Vintage Blue- Glitzers
Glitz Designs- Vintage Blue paper- Floral
Kraft Bazzill
Book paper
Twine
Prima Canvas
Prima Pixie Glen flowers
Prima packaging
Stampin Up punch - banners
Tim Holtz die- keys and locks
White paint
Tim Holtz distress ink
Glimmermist
Cheery Lyn flourish die
Cardboard
Alphas
Buttons
Glitz - Beautiful Dreamer- Whatnots

Wednesday, 26 October 2011

Inspiration Wednesday - Melissa Frances - Part 2

Hi Ladies and welcome to Inspiration Wednesday. I have another layout to share using the beautiful soft colours of the 5th Avenue line by Melissa Frances. This range is beautifully soft and would be great for baby photos as it has both pink , blue and soft green elements- as well as both girl and boy layouts. This range has stunning embellishments that make creating not only fun but easy as well.

This layout shows my third daughter in a common activity at the moment - busy scribbling or drawing in her notebooks- she is almost ready for school and it is neat to see her start to take an interest in writing!

Here is my layout


I am in love with these gorgeous Spellbinder dies that help you to create stunning flowers from your left over papers! The Websters trim is nice and pink and sparkly and the mistables are easy to glimmermist in the right shade for your layout !

I hope that you will have a play with some of these papers and products!

Happy Scrapping

Francine

Products Used
Spellbinders Die
Doily
Silver thread

Tuesday, 18 October 2011

Step by Step with Melissa Frances

Hi Ladies and welcome to Tuesday Step by Step. I thought that i would try something different today and something that i have seen quite alot on the internet recently. Today i want to share a  step by step layout that shows you how i pull everything together. This is the finished layout that is the end product!


I was delighted when Adrienne gave me the new Melissa Frances to have a play with this month as it is very much my style and so beautiful! i love the soft pastel colours and all the matching embellishments- it makes building a layout very easy!

So i guess the first thing that i think of is story that i want to tell and what photo/s can i use to tell this story. I wanted to do a layout about my sweet four year old who always picks me flowers- everytime she sees one she picks one for me- and on this day i said to Lucy- " thank you for all the beautiful flowers that you give  me" and she said- "its because i love you mum". Awww so sweet. So i knew that i wanted to have this story as the feature of my page- usually i have hidden journalling on my pages but this time i wanted to have the story out there in front. Of course i didn't have an actual photo of her giving me flowers so i used one of my portrait photos that i try to take every month of each girl. Then i can add the journalling that i want that will go with my photo.

So once i have decided on my story and photos i then collect all my products together and lay them out on my desk. For me a page isn't me if i don't have at least 3 papers as i like to use lots of layering so once i have my 3 papers i then work on my embellishments. I bascially collect all the matching embellies that i have that go with the papers- this is easy as i tend to always buy some of the matching embellies that go with a range of papers that i like- but dig through your stash- look for elements that can be cut out of papers and packaging too- the lady in the cluster on the left was cut out of the packaging from the pearls i used. If you don't have matching embellishments- use white and glimmermist or colour them to match up!


You will notice that not everything in the picture got used- once i have my base sorted then i have a play around and see what looks good.

So the next step is arranging a good base for me to build the layout and embellishments on. So i cut my papers and arranged them like so. A couple of layers behind my photo and a small doily to break up the squareness of my layering is next before i add a punched layer going across the page. Because the papers are quite light i tend to always ink all the paper edges so that they stand out from each other too.


Because of the oval shape of the pattern on the paper - i wanted to emphasise that so i adhered some ribbon around the oval shape to give it some dimension and interest as well. A few more layers of stickers across the punched horizontal piece and i am happy that i have a good base to now have a play with some embellishments.

The embellishing stage takes by far the longest - and a fair bit of moving things around and adding and taking different things off till i am happy with how things sit. Quite often i will go away and then come back after 5 minutes and it can give you a different perspective and you can move things to a better place! I usually have 2 main embellishment clusters - one larger than the other with a mixture of sizes and shapes and dimensions for interest. You just have to play till you are happy!

I kept this cluster quite simple- with flowers. leaves, butterfly and the handcut lady - i had a tag and canvas pieces and chipboard pieces too that eventually got eliminated! They just didn't look right as they were too square or rectangular next to the rounder flowers. I added a square resin piece to the smaller cluster which looked better to me.

So here was the finished product again...with the title added to emphasise the story that i was telling in my journalling...

I hope this helps you see some of my creative processes and how i put a layout together... and helps you to maybe try a few new ways to create too....

Happy Scrapping

Francine

Products Used

Melissa Frances- 5th Avenue- Chipboard pieces
Melissa Frances- 5th Avenue - Rhinestones
Melissa Frances- 5th Avenue- Sticker Book
Melissa Frances- 5th Avenue paper- Geraldine
Melissa Frances- 5th Avenue paper- Hattie
Melissa Frances- 5th Avenue Paper- Minerva
Melissa Frances- Resin Frame- Newstand
Prima Ribbon
Prima Flowers
Martha Stewart Punch- Deep EdgeHearts
Martha Stewart Butterfly punch
Spellbinders Butterfly die
Petaloo Flower
Prima alphas

Friday, 14 October 2011

Second challenge for October

Hi Ladies and welcome to the second challenge for October. All entries are due by the 31st of October and don't forget that you are in the draw to win some great prizes from Adrienne. You also get  a chance to be in the spotlight and have your layouts featured on the blog and in the newsletter as well assetting a sketch challenge for others to complete.

This challenge is a really easy one- i would like you to try a technique that you haven't ever tried before on your page- on my page i used a piece of discarded paper from the back of a felt flourish. I literally grabbed it out of the rubbish bin and used it as a mask on my page- i couldn't find my glimmermist that i wanted so i inked it instead!

I would love to see what you all try on your pages- if you are stuck as to what technique you could try - have a look at the past technique Tuesdays- on the blog page go on the search box and type in Technique Tuesdays and a list should come up from previous posts to give you some ideas. Maybe you already have something in mind that you have always wanted to try- now is the time!!

Here is my layout using the masking technique


I am looking forward to seeing what you come up with - make sure you mention what technique you have tried- so that others can see and learn from you too!

Happy Scrapping

Francine

Products Used


Tim Holtz- film strip

Kaisercraft- Black Flourish

Petaloo and Kaisercraft Flowers

Imaginarium Chipboard title


(JUst wanted to add that this was based on a sketch for Little Shop of Sketches . )


Friday, 5 August 2011

Product Focus Friday - Journalling Cards

Hi Ladies and welcome to Product Friday.

This week i wanted to show you how you can use Journalling cards as embellishments and not just for journalling! I was given a Jenni Bowlin tag booklet to have a play with and came up with a layout and a card using some of the different journalling tags in the pack. Each pack is great value for money - my pack was called Diecut Journal Pad Vintage and had 6 different tags and you get 6 of each tag so 24 in total which would last for quite awhile!

For my layout i went with a vintage theme to match the tags- i cut out the border from one of the tags and used as an embellishment on the top left of my page- i thought it looked kind of like a sign and hung a timepiece from it. I cut out the centre of the tag and did actually use it as journalling - tucked behind my photo. The other journalling tag i used as a base in my embellishment cluster on the right side of the photo.

Image
Image

Here is my completed layout... i loved cutting around the window and adding a diecut behind it..
Image

Image

I also made a card using the same gorgeous Bo Bunny papers and a journalling tag. My first card!

Image

I hope that you will try some ways of using tags as embellishments on your pages too

Happy Scrapping
Francine

Products Used

Jenni Bowlin Diecut Journal Pad- Vintage
BoBunny Timepiece paper- Villa
Timepiece- Petals
Timepiece- Dots
Timepiece- Numbers
Tick Tock
Basic Grey Curio Paper
Lace
Prima Transparency
Buttons
Brown Bazzill
Kaisercraft Chipboard
Jenni Bowlin Tag and twine

Wednesday, 20 July 2011

Inspiration Wednesday with Francine

Hi Ladies and welcome to Inspiration Wednesday. This week i wanted to share a couple of layouts that i di using the Animal Crackers Line from Imaginisce. This range has a circus theme and has a range of colours - from blues to maroons and greens. Each paper has a normal side and a glossy textured side for extra creative fun.

The first layout i kept with the animal theme and scrapped a gorgeous photo i managed to get at Orana Park and features one of the new baby giraffes getting a kiss from mum.

Image

I tried to emulate the giraffes spots with my trusty bubblewrap stamp from Kaisercraft and added paper layers on top and some ribbon.

The second layout doesn't have the greatest photo but show the fun that the girls were having running around with their dad at the park.

Image

I hope that you will give this range of papers a go as they are very versatile!

Happy Scrapping
Francine

Products Used

Animal Crackers Sticker Stackers
Kaboom Paper
Pixie Sticks
Under the Big Top paper
Ribbon
Buttons
Chipboard Buttons
Misc Chipboard
Paint
Tag and Clip

SKETCH BLOGS EXTRA

i have had quite a few people lately at crops etc ask me for the names of some good sketch sites so thought that i would add some to thsi weeks post. Please note too that i have used a sketch that i saw in a Scrapbooking Memories magazine for the giraffe layout although i have altered it quite abit !

My fav Sketch sites

Once Upon a Sketch- journalling sketches- two weekly
Get Picky- multiple photos- every 2 weeks
Creative Scrappers- every week
Pencillines- every week
Sketchabilities- every 2 weeks
Stuck on you Sketches
Prima BAP each month
BoBUnny has sketches too every 2nd Friday
Challenge me Happy
Sketchy Thursdays
STUck sketches
Inspired Blueprints
Glitz Designs- have sketches every month or so

So if you are stuck these are great to try to get the mojo flowing again!

Wednesday, 6 July 2011

Inspiration Wednesday with Francine

Hi Ladies and welcome to Inspiration Wednesday!

This week i wanted to show you a couple of layouts using the new Imaginsce- Berrylicious range of papers. When i first saw them i thought mmmmm- not my usual style of papers what could i do with these? They would be great for baking or gardening photos- but i didn't have any of those so i thought why not use them for some birthday photos? I certainly have plenty of those to scrap and bright colours are perfect for birthday fun.

This is the first layout that i did...

Image

i went abit crazy with the stars but like the effect. I was really happy with this one as i normally never use these colours at all!

The second layout i used again some birthday photos- i kept this one more simple and rolled my edges using my quilling tool

Image

I hope that these layout inspire you to try some colours that you normally wouldn't use and also to try and scrap some multi- photo layouts of birthdays that normally get left at the bottom of the pile!

Happy Scrapping
Francine

Products Used

Berrylicious Papers- Berry Patch
Berrylicious- Sweet Summer Garden
Berrylicious- Just Peachy
Berrylicious - Fresh Phrases- Diecuts

Tuesday, 14 June 2011

Scrap Tech Tueday - Corner Punches

Hi Ladies and welcome to Scrap Tech Tuesday.

This week i wanted to show you an inexpensive way to make your own diecut shapes using your corner punches. With the popularity of spellbinders and other dies this is a poor mans version that will still give you some great results. i used 2 different punches to show you the different effect that you can get and then used both on a layout.

Here are the 2 punches that i used - but any that you have will work too...

Image

Firstly i cut out some circle shapes- the bigger the circle the easier it is and the better effect with some punches but have a play ...
You have to line up your punch- looking at the bottom of the punch as you line it up - just above the edge of your circle and punch hard. This is the result.

Image

Then watching very carefully on the bottom of your punch line it up as best you can just above the edge and to the right of your last punch...
Image

Once you have punched the whole way round it will look like this - with triangles between each punch - these can be popped out ..

Image

The finished diecut shape

Image

I then used a different punch to do some smaller circles in a different colour.

Image

I then created this layout using the three punches circles...this is my second daughter Ella who has the KEMP hair (my maiden name) hence the wordplay in the title.

Image

Products Used

Prima Botanical Paper - Sweetheart
Prima Alphas
Prima Flowers
Bazzill Cardstock
Pinecone Ink
Kaisercraft Ribbon
Creative Imaginations- Leaf paper

i hope that you will give this technique a try...

Happy scrapping

Francine

Sunday, 1 May 2011

May 1st - Fort nightly challenge

Hi Ladies,

Welcome to the first challenge for May 2011. The theme this month is "Along the Lines", so think lines on your pages, stripes, lots of horizontal, diagonal, vertical lines on your pages.

Remember that there are 3 challenges per month- the sketch challenge, todays recipe challenge- and on the 15th the third challenge-

Remember to be in to win the gorgeous RAK from Adrienne at Scrappin Patch you need to enter at least 2 of the 3 challenges and you also get the chance to shine in the SPOTLIGHT. You will be interviewed by Hannah and your interview and examples of your creations will be posted on the forum so that we can all get to know you and your fabulous work.

Okay the recipe for this month is

1 patterned paper that must have lines on it- it can be striped or journalling lines- you could paint lines whatever you like
Chipboard
Ink or Glimmermist
Butterflies
Journalling tag using lines

Easy peasy this month! I am looking forward to seeing your creations in the gallery...

Here is my example layout

Image

Products Used

Prima Reflections Collection- Meadowlark
Reflections Journal Notecards
Reflections Journal Stickers
Prima - Alphabets- Brown
Prima Flowers- Reflections
Kaisercraft Chipboard Gates
Pinecone Ink
Kaisercraft Crochet Doily

Wednesday, 9 February 2011

Inspiration Wednesday with Francine

Welcome to Inspiration Wednesday- todays inspiration is of course to inspire you to create some lovely Valentines layouts for the partner in your life. This week Adrienne gave me some My Minds Eye- State of Play papers which were very lovey dovey in muted reds and pinks and come with a diecut sheet which makes it easy to embellish your page with matching embellies.

Here is the layout i created using this line

Image

I have had a big diecut heart shape in my stash since i first started scrapbooking years ago so thought that i would drag that out to use on this layout of my husband. i traced round the shape onto one of the papers in the range since my red diecut was too bright for the papers. Lots of inking around all the distressed edges to give a more masculine feel as well. i used some calico and ruched it up abit with some plain swirly stick on ribbon to look more masculine as well.

i made an envelope out of my scraps to write all my journalling in so that stays private!! A great idea for layouts where you want to Add heartfelt journalling that only you can open and read. Of course my layout woudn't be complete with out some flowery embellishments somewhere so i added this prima vine rather than flowers.

Why not make a layout of your loved one? It's easy to forget the partners- since most of our pages tend to be focussed on our adorable children!


I hope that this will inspire you to have a go and i hope to see some amazing layouts in the gallery coming up to Valentines Day on the 14th February.

Francine

Products Used

State of the Heart- Accessory Sheet
Full of Love paper
Love Meter
Sweet Nothings
Prima Valentine Vine - Red
Calico
Ribbon
Prima Red Alphabet stickers

Saturday, 5 February 2011

February Sketch Challenge - Handmade with Love

Hi Ladies,
Welcome back to the challenges on the forum. :yahoo:

On the first Saturday of the month there will be a sketch challenge put up by one of the design team members. To be in the draw for the RAk and a chance to be the Designer in the Spotlight you need to enter all 3 challenges for the month. YOu have till the end of the month to upload your creations here to be in to win....

This months sketch is a Pagemaps one from October 2010 but thought that since its Valentines Day soon and the month of love that this sketch with all its hearts would be perfect... If you haven't checked out Pagemaps yet please visit their site on www.pagemaps.com ......... they have monthly sketches for 12 by 12 and double layouts and 8 by 11 sketches too.

With out further ado here is the sketch for this month... remember to keep in theme for this month- handmade with love...

And here is my version of this sketch- with sewing - a miracle for me- it really is handmade with love for me to attempt sewing!!

look forward to seeing your creations
Francine

Monday, 31 January 2011

Technique Tuesday Returns!!!

Hi Ladies and welcome back to the Scrappin Patch challenges for 2011. We have lots of new things happening this year that will hopefully inspire you to try some new techniques and challenges!

This year Technique Tuesday will be slightly different - it will run fortnightly in line with the fortnightly challenges and there will be 2 different aspects to the technique Tuesdays. Technique Tuesday will run along similiar lines as last year where one of the design team will share a technique for you to try. The following fortnight a design team member will be posting a step by step technique based layout for you to try - with full instructions for the whole layout. This way you will be able to see how to do the technique and create a layout using some new techniques. We hope that you will enjoy this new feature - any feedback is always welcome!

This week i wanted to show you how you can really add some dimension and interest to your page by adding accordion style paper ruching to your pages. Its a technique that i use alot on my pages to give interest and dimension and is really easy to do!

Firstly i cut strips of cardstock or paper about 3cm wide and then using my Martha Stewart lace punch i punch along one side. So it looks like this....

Then i fold about every third scallop piece back over like this...

Then using double sided tape i carefully place the pieces around the shape that i am using.

These are some examples of layouts where i have used this technique.

and using a circle shape

and a bracket shape


Give it a go and see how easy it is to give your pages a lift!

Happy Scrapping
Francine

Tuesday, 9 November 2010

Technique Tuesday - Make a mini album in 1 hour

Hi Everyone,

I happened to chance upon this little gem the other week- designed by Anna Bowkis and thought that i would have a go. I'm not usually an off the page girl but am always open to trying new things! You really do use only one piece of cardstock- its all in the folding! You will need a few smaller photos - so 2by3 or i cropped a 5by 3.5 down abit. It was great for using up some old papers i had that had the alphas and elements with it - so old Basic Grey kits etc would be great to use up for this little album.

Here are a few pictures so you can see what i mean before i get to the instructions

Image

so -

Step One-

Cut your piece of cardstock into 3 strips of 10cm wide


Image

Then you need to mark and fold at these points.

Strip one- 5.5cm and 13.5cm and 24cm
Strip 2- 13cm and 28cm
Strip 3- fold in half- this is your cover
Image

Use double sided tape to stick the ends of strips 1 and 2 together make sure that they overlap

Stick the last flap on strip 2 to the inside back cover of your strip 3.

Once you have stuck it all togther you will have a long fold out book ready to decorate how you choose. Make sure you decorate both sides!Here are some of my pages using cut out embellies, a few flowers, bling , journalling stickers etc.

Image

Image
Image

It was a very easy and fun album to do in about an hour. My 7year old daughter saw my album and made one too over the weekend- a great easy project for kids to do too!

I hope that you will give it a try!

Francine

LinkWithin

Related Posts Plugin for WordPress, Blogger...