Showing posts with label Birthday. Show all posts

Monday, 6 August 2012

DT Inspiration - Fancy Pants Designs

Hi everyone!

Today I'm sharing with you the fun range from Fancy Pants Design - Summer Soul! This collection is sure to get you in the mood for summer with its bright colour palette and beachy patterns.

I chose to make a birthday card and here it is...


I wanted to soften the background a little so I overlaid some vellum, then layered some embossed paper (using the reverse side), added some bakers twine, a rosette detail and banner sentiment. I'm really happy with how it came out.

I've got some more cards to share with you this month using this summery collection so make sure you check back :)

x Lana

Products used: Summer Soul 6x6 Paper Pad, Summer Soul Chipboard Banners, Tim Holtz Rosette Die.

Thursday, 7 June 2012

DT Inspiration

Hi everyone!

Today I'm showing you a couple of cute cards for boys using the Best Creation Inc Robot range.

My first card is quite simple and easy to make but still very effective with its geometric shapes. I wanted to use squares to show off a selection of the patterns within this range. To soften the look a little I put a vellum circle over the squares. I finished the look with more circular shapes showing off the number 5 and a strip of green ribbon to tie all the colours in.


My second card features this gorgeous wee robot I found lurking in one of my craft drawers. Unfortunately he's not part of the Robot range but there are still plenty of other robots to choose from within that range. Since this guy is so cute I wanted to make him the focus so I just built the card around him using a rocket journalling piece from the range, some banner detail and a bit of black twine.


Hope you enjoyed my inspiration for you today. Make sure you leave a comment, I love reading your feedback :)

x Lana

Products used: Best Creation Inc Robot,  Bazzill Cardstock, Tim Holtz Distressing Tool

Thursday, 31 May 2012

Cupcakes!

Hi everyone :)

Today I'm sharing more of the Best Creation Inc's Let's Party range. I loooooove cupcakes, the look and taste! So I thought I'd make a couple of cute cupcake cards using some cupcake elements that can be found within this range.

My first card features a doilie background that I've sprayed with some Shimmerz Paints Coloringz in Pink Stiletto. This gave a nice texture to the base of my card. The main feature is of course the cupcake and I've finished that off with a button detail and the sentiment.


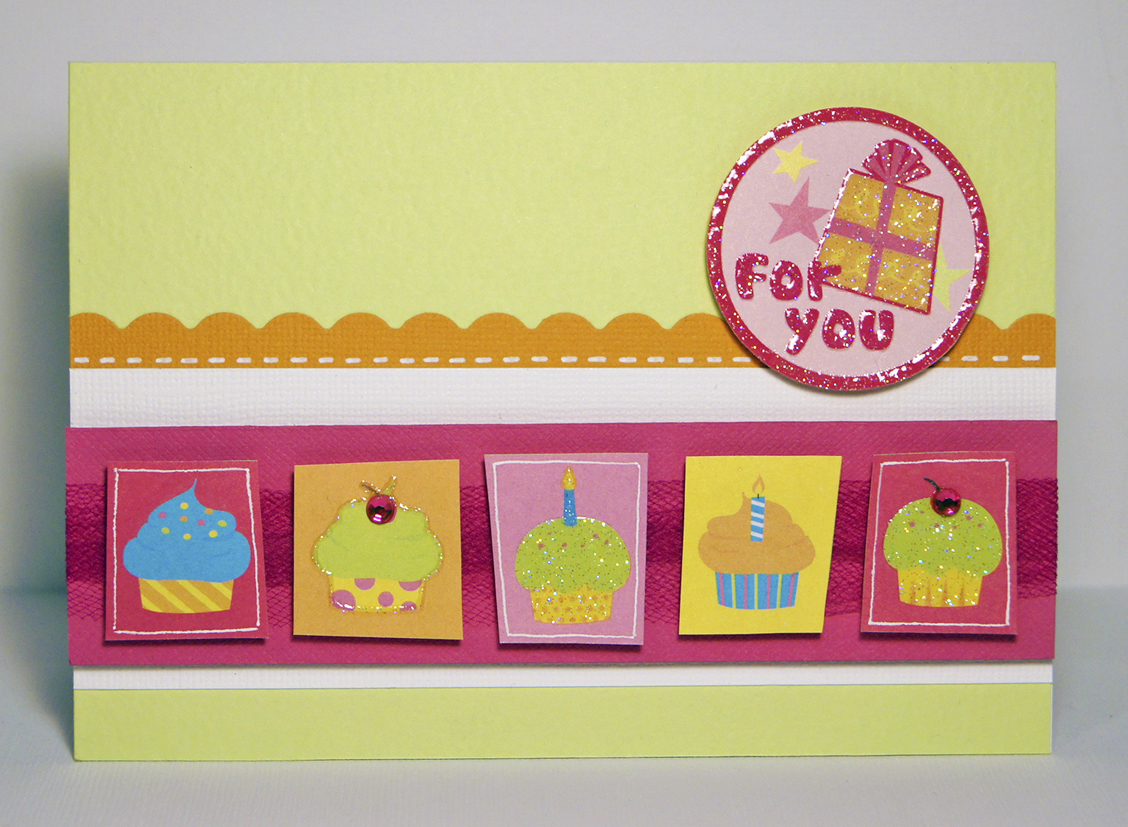
For my second card I cut out some cupcake shapes that be found on one of the Let's Party sheets. They're set on a green background on the sheet but I wanted to put them on pink girly strip. To make the pink cupcakes stand out from this I just added a simple white gel pen border. Then I added a couple of rhinestones for some extra bling :)


Thanks for stopping by! I hope this gave you some inspiration for your next card project :)

x Lana

Products used: Best Creation Inc Let's Party, Tulle, Doilie, Bazzill Cardstock, Shimmerz Paints Coloringz - Pink Stiletto

Monday, 14 May 2012

Step By Step - Birthday Card

Hi everyone :)

Today I'll be showing you how to make a bright and fun birthday card using the Let's Party range from Best Creation Inc. This range truly is colourful in every way and really screams celebration so it's a lot of fun to work with.

Step 1.

I used a striped pattern as my background and to give it a bit of interest I cut it into 4 equal strips. I love using multi-coloured backgrounds as it gives you a lot of colour options later on in your project - basically any colour combination you choose from the background will work - perfect!

Step 2.


I love making cute little candles out of paper and a bit of cotton or bakers twine. They're so easy! All you have to do is cut a square or rectangle and fix a piece of cotton so it sits at the top left or right corner, then start rolling them up with the cotton on the inside. A handy little tip is roll them around a thin paint brush or pencil to get them started as the first roll can be the tricky bit.

Step 3.

As this card is all about celebration I wanted to include a couple of little streamers. So I cut a few thin strips of paper in a few different colours then gave them a slight curl with some scissors (as you would with ribbon). When it comes to sticking these down and creating a streamer effect I fix the top of the streamer to some card then twist it around a few times and then fix the bottom. Easy as that! The Let's Party range also includes a pattern that features streamers, as shown on my previous post, so it's a nice little tie in :)

Step 4.

At the beginning of any card I only stick my background paper down and leave everything else loose so I can move things around and change colours etc. Here you will see I have all of my main components that I want to use.

Final product!

Everything is now fixed in place and the card is finished off with a sparkly sentiment from the Let's Party range. I also added tiny bit of glitter to the streamers for some extra sparkle. Another tip, because of the shape, when sticking the candles down I like to use a really strong adhesive like a hot glue gun so I know that they'll never fall off.

I hope this has given you some inspiration for your future birthday cards or layouts. Until next time :)

x Lana

Products used: Best Creation Inc Let's Party, Bazzill Cardstock, Kindy Glitz - Crystalina, Tim Holtz Distressing Tool, Tim Holtz Distress Marker - Picket Fence.


Saturday, 5 May 2012

Weekend DT Inspiration

Hi everyone

I've got some birthday cards to share with you today. All cards were made using the Let's Party range from Best Creation Inc. With its fun, bold bright colours and patterns it will definately get you inspired!

My first card is quite simple as I wanted to let the pattern shine. Most of the Let's Party range features overglossing and glitter for extra effect so you don't actually have to do a lot to it to make it look good!


My second card features one of my favourite colour combos - bright red and aqua blue. I love the bold red background, it really sets off the tag and stamping detail at the bottom. The tag is part of a sheet that features a whole lot of cute pictures including birthday cake, candles, cupcakes and more journaling tags.


My third card shows off one of those pics - the cupcake! I love anything cupcake related (especially eating them! Hehe) The Let's Party range includes a huge selection of cupcake goodies which I can't wait to share with you next week. Aside from the cute cupcake pic I love the unexpected texture of the twine.


Hope you enjoyed my latest post. Look out for my next projects throughout the month.

x Lana

Products used: Best Creation Inc Let's Party,  Basic Grey Yummy Resin Buttons in Marshmallow,  Grosgrain Ribbon in Celery

Monday, 9 April 2012

Best Creation Inc - ROBOT

Hi everyone

I hope you're having an enjoyable Easter break. The weather in Christchurch has been gorgeous!

Today I've got some bright and fun inspiration for you from the Best Creation Inc Robot collection. This is such a fun range and perfect for anything related to kids. It's full of bold bright colours, fun graphics and glitter for that extra pizazz. The best part is that the whole range is double-sided giving you lots of choice.


So onto the project! I made a card tailored towards someone young or young at heart! It could be given as a birthday card or to brighten someone's day.

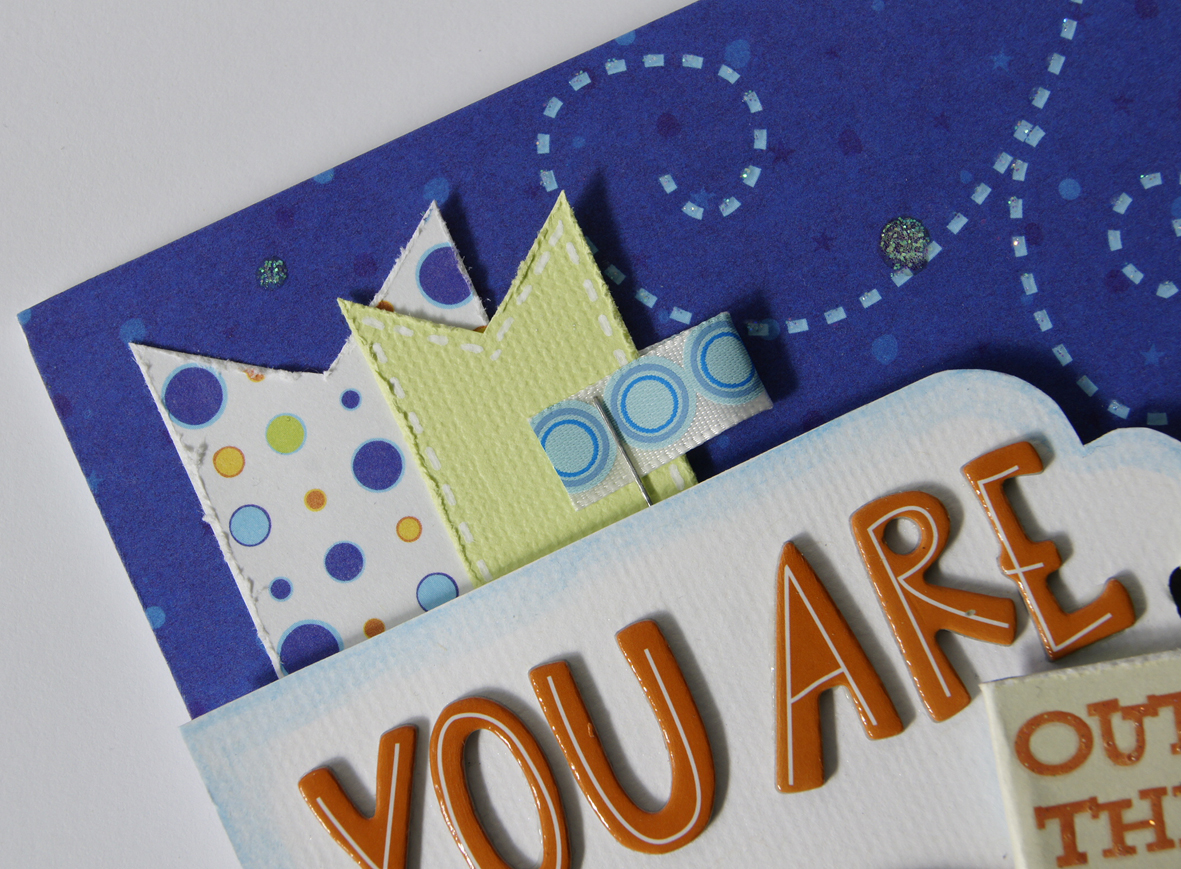
I used a dark blue background for my sky. This already had little bits of glitter scattered around but I added my own Kindy Glitz for that extra star sparkle. For the base of my sentiment I used a tag. I love using tags in cards. They're perfect for when you want something simple but with a little shape plus when you add some ribbon to the end it creates some great dimension.


The 2 main elements on my card, the rocket and the flag, came from the tag sheet that's part of the Robot range. It has 17 different tags for you to choose from that include various sayings and space for journalling. The rocket tag actually had a blue background but I trimmed around that and added my own personal touches with the buttons and the orange tulle behind the flame. The 'Out of this world' was just a square tag so I cut a banner shape and attached it to a toothpick and viola! You have a flag :)


To finish the card off and to give some balance to the design I added some banner detail to the top of the tag with some folded over ribbon. Little elements like this are a great way to use up your stash.

Hope you enjoyed today's inspiration. I can't wait to share more with you soon.

X Lana

Products used: Best Creation Inc Robot tag sheet, Best Creation Inc Robot Alien Shuttle sheet, Tulle Butterfly, Bazzill Cardstock, Kindy Glitz - Crystalina, Tim Holtz Distressing Tool.

LinkWithin

Related Posts Plugin for WordPress, Blogger...