Hi Everyone!
Ive had a wonderful five weeks holiday since I last posted, spending three weeks of it catching up with friends in the UK that I have'nt seen in 12 years - it was magical, and inspiring and so worth the trip - be prepared for lots of photos finding their way through to SP's blog in the way of scrappy goodness :)
This month I have three pieces of inspiration to show to you, and all quite different. This week I have Prima's En Francais :) If you know me you will know that Prima is one of my favourite brands to work with, so I was pretty pleased when this turned up in my DT kit :) It showcases some of my favourite colours, blue, brown, beige and grey.
When I was wondering what I was going to alter this time, I decided to have a wander through the second hand shop that has sprung up recently at our local rubbish tip. Sounds quite revolting does'nt it? But its not, - for those of you overseas, its really just a secondhand shop or thrift shop that has all of those items you don't want cluttering up your house anymore, but are too good for the rubbish tip. So, I was wandering through here and found this box within minutes of entering the shop. The lady at the checkout was keen to know what I was going to do with it, and as soon as I said I was a scrapper she got so excited lol :)
This little beauty, is big enough to hold papers in or whatever else you choose. Ive used different pieces from the range and lots of layers; wooden buttons, chipboard, flowers, tickets and papers of course as well as chipboard cogs from my stash and a Martha Stewart Punch.
If you're lucky enough to be going to the Spring Retreat this weekend, this will be up for grabs as one of the prizes to be won! Good Luck!
Thanks for popping by :)
Megan
Showing posts with label Martha Stewart Punches. Show all posts
Saturday, 8 September 2012
Saturday, 7 July 2012
A month of Basic Grey
Hi there!
This month I have three posts for you using Basic Grey Picadilly. Its by no means a new range but I thought I would show you three different ways Ive used the range in three completely different ways. I picked this range because it had a lot of what I look for in patterned papers - bright, funky colours, versatility with plains and patterns and Ive also developed a Nic Howard fetish for aqua :) and its in the range too!
So first up lets go with aqua.
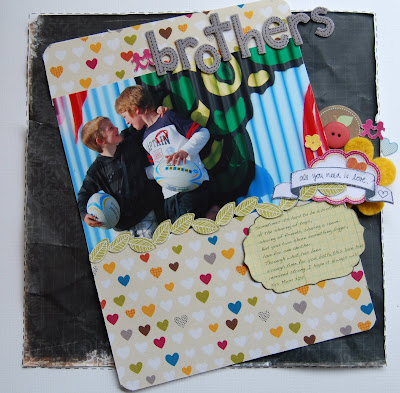
Ive gone right outside the OTP box and completed a layout - now don't look so shocked I do create the odd layout you know :)
This photo I have used is very precious to me. I lived in England for four years and one of closest friends had super parents who became my 'surrogate' parents while I was over there, and even though Im home now and have been for 12 years they were still my surrogates. This is one of the last photos I have of my 'parents' and sisters, both Mum and Dad have recently passed away within months of each other from Cancer. So this photo is precious; the last time they were all together, whilst Mum was still fighting her battle and before Dad started his, and scrapping it was like therapy for me, a lot of tears shed, but a lot of precious memories remembered too.
And a close up of that cluster,
The specific papers from the range Ive used are Apple Orchard, and Breadbox - the versatility of the range means I could use both sides of the Breadbox paper. I have distressed around all the edges, and layered my patterned paper onto cardstock. The flowers are a mixture of Petaloo from my stash and some old Prima flowers mixed with some lovely resin pieces.
My title is chipboard from 2Crafty, which I have randomly applied texture paste to and then inked. The flourish is from the same company but this time I inked it with pinecone and then randomly sprinkled glitter before clear embossing the whole thing to set it.
Next time we're going in completely the opposite direction, bold and bright and yes, back to OTP :)
Thanks for stopping by!
Megan
This month I have three posts for you using Basic Grey Picadilly. Its by no means a new range but I thought I would show you three different ways Ive used the range in three completely different ways. I picked this range because it had a lot of what I look for in patterned papers - bright, funky colours, versatility with plains and patterns and Ive also developed a Nic Howard fetish for aqua :) and its in the range too!
So first up lets go with aqua.
Ive gone right outside the OTP box and completed a layout - now don't look so shocked I do create the odd layout you know :)
This photo I have used is very precious to me. I lived in England for four years and one of closest friends had super parents who became my 'surrogate' parents while I was over there, and even though Im home now and have been for 12 years they were still my surrogates. This is one of the last photos I have of my 'parents' and sisters, both Mum and Dad have recently passed away within months of each other from Cancer. So this photo is precious; the last time they were all together, whilst Mum was still fighting her battle and before Dad started his, and scrapping it was like therapy for me, a lot of tears shed, but a lot of precious memories remembered too.
And a close up of that cluster,
The specific papers from the range Ive used are Apple Orchard, and Breadbox - the versatility of the range means I could use both sides of the Breadbox paper. I have distressed around all the edges, and layered my patterned paper onto cardstock. The flowers are a mixture of Petaloo from my stash and some old Prima flowers mixed with some lovely resin pieces.
My title is chipboard from 2Crafty, which I have randomly applied texture paste to and then inked. The flourish is from the same company but this time I inked it with pinecone and then randomly sprinkled glitter before clear embossing the whole thing to set it.
Next time we're going in completely the opposite direction, bold and bright and yes, back to OTP :)
Thanks for stopping by!
Megan
Saturday, 19 May 2012
A book, a card and tutorial
Hi Everyone!
Today I have the glorious Meadow Lark Collection to show you, specifically their notecard set - 30 cards in total with five different designs, which makes them pretty good value for money. Ive never used the entire collection before though, usually Ive purchased the mini packs and used them in layouts or cards, but this time I set myself a bit of challenge to see what I could come up with using the entire set!
Well, what better idea than to make a birthday book! I intended this wee book to be a gift for someone we all know, who's just celebrated a birthday :) - if you happen to be scrapping up a storm tomorrow in the shop she might just let you see it!
The front and back covers are made from thick chipboard and covered with some old Prima from my stash, inked in Pinecone and decorated with seam binding ribbon, Martha Stewart deep edge punch and Prima heart. Ive used rings along the top to bring the whole thing together. Each page is made with Prima packaging either one of the old green ones or the newer floral ones - it pays to keep them, they come in very handy :) ! For each 'page' I adhered a notecard front and back, and decorated it, or adhered a page of dates. Heres a few of my favourite ones:-
Because there are twelve pages to the book, I needed to make sure each page didn't have too many dimensional embellishments, so I used lots of lace, Green Tara and Manor House flowers, edge punches and Spellbinders dies, to decorate each side of the page.
With the scraps I made a birthday card and a tag :-
With the tag Ive stamped on the background using one of Prima's new stamps, using Versamark ink. One of the great things about using Versamark is that it does three things - you can use it to emboss, to adhere powder, like Pearlex or to create a watermark effect, or in other words, when you use it to stamp onto a light coloured cardstock it turns out a darker shade of that cardstock. Like this:
then I just decorated the tag with lace, one of the remaining notecards, some of the new Prima bling and my favourite Spellbinders die - check out that butterfly! :))
Did you spy any of those new Manor House flowers? If you did, comment which one they are and you could win a small collection of them and the new Prima Stamp Ive used.
Happy Scrapping Everyone!
Megan
Today I have the glorious Meadow Lark Collection to show you, specifically their notecard set - 30 cards in total with five different designs, which makes them pretty good value for money. Ive never used the entire collection before though, usually Ive purchased the mini packs and used them in layouts or cards, but this time I set myself a bit of challenge to see what I could come up with using the entire set!
Well, what better idea than to make a birthday book! I intended this wee book to be a gift for someone we all know, who's just celebrated a birthday :) - if you happen to be scrapping up a storm tomorrow in the shop she might just let you see it!
The front and back covers are made from thick chipboard and covered with some old Prima from my stash, inked in Pinecone and decorated with seam binding ribbon, Martha Stewart deep edge punch and Prima heart. Ive used rings along the top to bring the whole thing together. Each page is made with Prima packaging either one of the old green ones or the newer floral ones - it pays to keep them, they come in very handy :) ! For each 'page' I adhered a notecard front and back, and decorated it, or adhered a page of dates. Heres a few of my favourite ones:-
Because there are twelve pages to the book, I needed to make sure each page didn't have too many dimensional embellishments, so I used lots of lace, Green Tara and Manor House flowers, edge punches and Spellbinders dies, to decorate each side of the page.
With the scraps I made a birthday card and a tag :-
With the tag Ive stamped on the background using one of Prima's new stamps, using Versamark ink. One of the great things about using Versamark is that it does three things - you can use it to emboss, to adhere powder, like Pearlex or to create a watermark effect, or in other words, when you use it to stamp onto a light coloured cardstock it turns out a darker shade of that cardstock. Like this:
then I just decorated the tag with lace, one of the remaining notecards, some of the new Prima bling and my favourite Spellbinders die - check out that butterfly! :))
Did you spy any of those new Manor House flowers? If you did, comment which one they are and you could win a small collection of them and the new Prima Stamp Ive used.
Happy Scrapping Everyone!
Megan
Labels:
Green Tara,
Martha Stewart Punches,
Meadow Lark,
prima,
Spellbinders
Saturday, 7 April 2012
Easter OTP Inspiration
Hi Everyone!
April seems to have arrived soooo quickly!, and its Easter already. Hopefully not all of you have to work over the holiday period, and will have time to spend with family and of course scrap all those photos you're bound to take this weekend :)
A lot people I know plan Easter egg hunts around their property, to create a bit of fun and excitement for their little ones, and with that in mind I decorated a old paint tin I had lying around - it actually used to hold loads of prima flowers, but I kept hold of it thinking it would come in handy for something! I have seen these in the craft aisle at The Warehouse - writing this I seem to have a habit of going there for bits to scrap :)
Ive decorated the whole tin in Prima Celebrations paper - I wanted something Easter themed and this was perfect. Even though its from last season, who cares when it looks so good lol. (Theres still some in the shop I have'nt taken all of it lol.) For the bow I cut the strips I needed and distressed the edges, then I sprayed them with water and screwed them up in balls. Spread them out again and and played with them until I had the shape of my bow that I wanted, and waited for them to dry. Ive attached the paper bow with double sided tape and my trusty hot glue gun.
On the lid I created my garden for the Easter egg hunt with a Prima vine and resin bridge. The little people, chickens and rabbit are cut from the designs on the paper. Everything has been hot glued on, and the lid still comes off to fill the tin with your wonderful stash of Easter eggs.
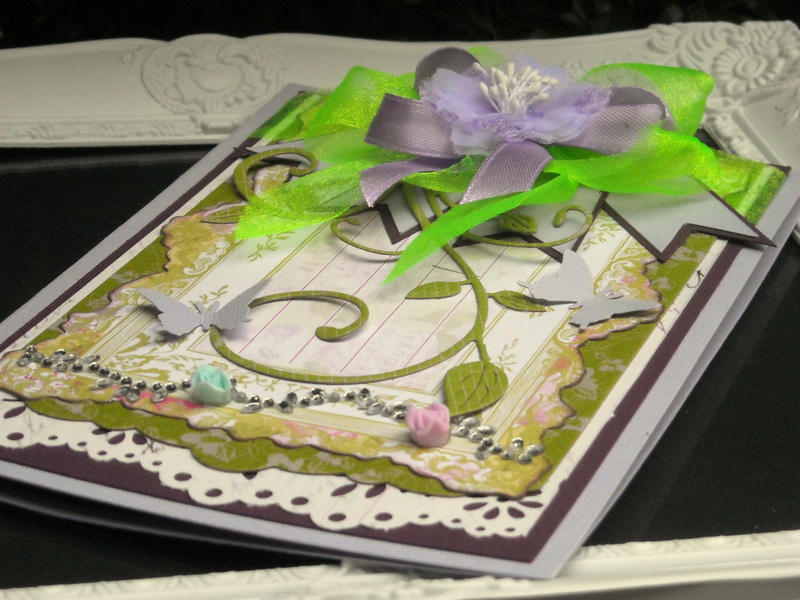
The card is made from scraps left over using three different Spellbinders dies for layering - Labels Twenty Three, Lacey Ovals and Large Classic Ovals. Behind the seam binding triple bow is a Martha Stewart punch.
Happy Easter everyone!
Megan
April seems to have arrived soooo quickly!, and its Easter already. Hopefully not all of you have to work over the holiday period, and will have time to spend with family and of course scrap all those photos you're bound to take this weekend :)
A lot people I know plan Easter egg hunts around their property, to create a bit of fun and excitement for their little ones, and with that in mind I decorated a old paint tin I had lying around - it actually used to hold loads of prima flowers, but I kept hold of it thinking it would come in handy for something! I have seen these in the craft aisle at The Warehouse - writing this I seem to have a habit of going there for bits to scrap :)
Ive decorated the whole tin in Prima Celebrations paper - I wanted something Easter themed and this was perfect. Even though its from last season, who cares when it looks so good lol. (Theres still some in the shop I have'nt taken all of it lol.) For the bow I cut the strips I needed and distressed the edges, then I sprayed them with water and screwed them up in balls. Spread them out again and and played with them until I had the shape of my bow that I wanted, and waited for them to dry. Ive attached the paper bow with double sided tape and my trusty hot glue gun.
On the lid I created my garden for the Easter egg hunt with a Prima vine and resin bridge. The little people, chickens and rabbit are cut from the designs on the paper. Everything has been hot glued on, and the lid still comes off to fill the tin with your wonderful stash of Easter eggs.
The card is made from scraps left over using three different Spellbinders dies for layering - Labels Twenty Three, Lacey Ovals and Large Classic Ovals. Behind the seam binding triple bow is a Martha Stewart punch.
Happy Easter everyone!
Megan
Saturday, 3 March 2012
New Shoes!
Hi Everyone!
Let me just put this out there now........................................................I hate shopping for shoes! I have size 4 feet so looking for shoes is the bane of my life, especially if I want you know really nice shoes for going out. So why not make some?! Sure, sounds easy when you say it quickly :) but turns out its actually quite fiddly as I soon found out.
So, I had scraps left over form a previous posting, yes I know I do have a thing about scraps at the moment lol, but instead of cards I made new shoes! The paper is Teresa Collins from the Notations range, and to decorate the shoes I used some cameo bling I found on sale at Diva, I just removed the chains from the necklaces and added some organza ribbon tied in a double bow. Around the edge of the heel I punched a trip of paper with my favourite Martha Stewart punch. The trick to making these I discovered was Tim Holtz glossy accents it dries so quick especially when its paper to paper.
When we buy shoes they come in a box too! So I found a wooden box with an ugly picture - I can't bare to cover up nice pictures so I always pick an ugly one and then I don't feel guilty - queer I know but there you have it :) - from the Warehouse for $7. Added some rough painting around the edges and layered the top with strips of punched paper, some double layered butterflies for dimension and some Petaloo flowers from my stash.
I reckon they look quite cool! I found the pattern on another blog I sometimes look at so I've included the link for you to get check out her tutorial. http://artfulaffirmations.blogspot.com/2010/01/elegant-shoe-tutorial.html
Go check out the tutorial and give them a go - I'd love to see them in the gallery if you do!, or better still bring them to retreat! :) Not many sleeps now!
Megan
Let me just put this out there now........................................................I hate shopping for shoes! I have size 4 feet so looking for shoes is the bane of my life, especially if I want you know really nice shoes for going out. So why not make some?! Sure, sounds easy when you say it quickly :) but turns out its actually quite fiddly as I soon found out.
So, I had scraps left over form a previous posting, yes I know I do have a thing about scraps at the moment lol, but instead of cards I made new shoes! The paper is Teresa Collins from the Notations range, and to decorate the shoes I used some cameo bling I found on sale at Diva, I just removed the chains from the necklaces and added some organza ribbon tied in a double bow. Around the edge of the heel I punched a trip of paper with my favourite Martha Stewart punch. The trick to making these I discovered was Tim Holtz glossy accents it dries so quick especially when its paper to paper.
When we buy shoes they come in a box too! So I found a wooden box with an ugly picture - I can't bare to cover up nice pictures so I always pick an ugly one and then I don't feel guilty - queer I know but there you have it :) - from the Warehouse for $7. Added some rough painting around the edges and layered the top with strips of punched paper, some double layered butterflies for dimension and some Petaloo flowers from my stash.
I reckon they look quite cool! I found the pattern on another blog I sometimes look at so I've included the link for you to get check out her tutorial. http://artfulaffirmations.blogspot.com/2010/01/elegant-shoe-tutorial.html
Go check out the tutorial and give them a go - I'd love to see them in the gallery if you do!, or better still bring them to retreat! :) Not many sleeps now!
Megan
Thursday, 1 March 2012
DT Inspiration with Michelle
Hi everyone,
I'm excited to share with you my first DT inspiration of my new term back on the SP design team. Can I just say that it has been such a honour to stay on the team with such amazingly talented new designers and some old friends as well!!
This month I received some gorgeous papers and embellishments from the new MME Miss Caroline ranges mixed in with some October Afternoon and some Cosmo Cricket. I just LOVE the new MME papers... I could go on all day about the gorgeous wood grained papers, the yummy colours and the fantastically priced embellishments but as I get to do another 3 blog posts this month... I might need to save some of my excitedness for the product for future posts.
I created my first layout using a lovely paper from Cosmo Cricket's Material Range. This patterned paper provided the perfect background paper for my layout as it provided that 'pop' of colour without having a busy pattern to compete with the other patterned papers or my photo. There is also something about the combo of yellow and denim blue which I just adore at the moment. I created a cute banner border and cut out some doilies from Cheery Lynn Designs to add a bit more femininity and interest to my layout. Lastly, I have embellished the layout using the MME Dolled Up Living Rubons and MME Dolled Up Favourite Label Stickers. The label stickers were a perfect way to add strip journalling on my layout and add interest in my title.
Some close ups
Other products used:
Basic Grey Buttons
Tim Holtz Rosette Die
Martha Stewart Doily Punch
I hope you have enjoyed my post today and stay tuned for some more inspiration from me in the next few weeks.
//Michelle
March Sketch Challenge
Its my turn for the sketch challenge this month, and I chose to use a sketch from Monika at monma.blogspot.com
Monika does some amazing sketches and you can see the rest of them on her blog by clicking on the link at the top of the home page, on her blog. She also happens to be the owner of one of Swedens biggest online forums Allt om Scrap.
Megan's Layout
I loved the simplicity of the layout too and you get to add layers without making looking too overloaded. Ive been a tad predictable :) and used my favourite papers from Prima Printery range and some flowers from my stash, and a Dusty Attic clock face. The metal clock face is Tim's and Ive turned the clock hands to the time the quake struck. This photo was taken on top of the Port Hills by someone else - I found it on Rise Up Christchurch facebook page.
Belinda's Layout
Hi Girls, this layout I really enjoyed as though it is a simple design, there is a lot of room to make it your own. For this I have embraced the Amy Tangerine range that Adrienne has in, it is so funky! Using white Bazzil as my base, then a scrap of Pink Paislee Vintage Moon distressed on top for contrast, I then layered Amy Tangerine Fabric Paper at the top and bottom of my photo. Using Amy Tangerine Wishing and All Together Stickers to embellish along with Amy Tangerine Hello Thickers for my title... fun eh!!
Hope you all enjoy the sketch and Im looking forward to see what you come up with!
Happy scrapping!
Megan
Sunday, 29 January 2012
OTP Inspiration with We R Memory Keepers
Hi Everyone!
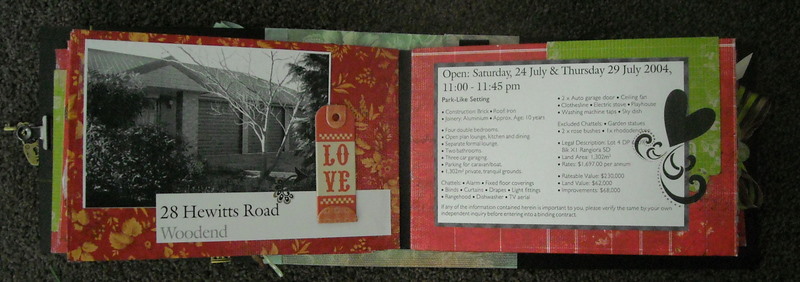
I thought I'd show you what I made with the rest of my kit using the Family Keepsakes range. The one thing I don't think we as scrappers are very good at is documenting things about ourselves because we are so busy documenting the stories of our children and family life, that sometimes we forget to step out from behind the camera. With that in mind, I decided to create a mini album about our house and the story behind why we bought it and what we have changed since we moved in 8 years ago. But like our house, I wanted to start it from scratch, another words I wanted to make the entire album, instead of buying a premade one I just had to decorate.
Theres a blog I follow called Follow the Paper Trail by Laura Dennison. This lady creates some amazing albums and OTP items, has a show on UStream showing you how to make them and you can also find the patterns and/or kits for sale in her etsy shop. I have bought a few of her patterns and this album was one of them, its called a Stack the Deck album.
The pages are made from envelopes, so I needed to make some to tie in with the papers I had left over, so I chose some old Daisy D's papers and made them. I then used the papers and chipboard stickers I had left over from my kit, as embellishments and yes Ive even used more Prima packaging as accents again too! Comes in very handy that packaging, grin! The covers are made from some extra thick black chipboard Ive had left over from ages ago.
With the second to last photo I created a flip tab, so I could have a journalling spot underneath the photo and then decorated the rear of the photo. And before you ask I did make a card with the left over scraps from the envelopes grin! (still sticking to that resolution!) The album is now in the shop for you to have a look through.
Happy Scrapping Everyone!
Other items used:
Cherry Lynn flourish die
Melissa Frances resin frame
Petaloo flowers - Canterbury Collection
Prima Cinderella vines
Imaginarium Designs chipboard fence
Martha Stewart edge punches and leaf punch
Tim Holtz mini bulldog clips
Basic Grey rubons
Donna Downey foam stamps
I thought I'd show you what I made with the rest of my kit using the Family Keepsakes range. The one thing I don't think we as scrappers are very good at is documenting things about ourselves because we are so busy documenting the stories of our children and family life, that sometimes we forget to step out from behind the camera. With that in mind, I decided to create a mini album about our house and the story behind why we bought it and what we have changed since we moved in 8 years ago. But like our house, I wanted to start it from scratch, another words I wanted to make the entire album, instead of buying a premade one I just had to decorate.
Theres a blog I follow called Follow the Paper Trail by Laura Dennison. This lady creates some amazing albums and OTP items, has a show on UStream showing you how to make them and you can also find the patterns and/or kits for sale in her etsy shop. I have bought a few of her patterns and this album was one of them, its called a Stack the Deck album.
The pages are made from envelopes, so I needed to make some to tie in with the papers I had left over, so I chose some old Daisy D's papers and made them. I then used the papers and chipboard stickers I had left over from my kit, as embellishments and yes Ive even used more Prima packaging as accents again too! Comes in very handy that packaging, grin! The covers are made from some extra thick black chipboard Ive had left over from ages ago.
With the second to last photo I created a flip tab, so I could have a journalling spot underneath the photo and then decorated the rear of the photo. And before you ask I did make a card with the left over scraps from the envelopes grin! (still sticking to that resolution!) The album is now in the shop for you to have a look through.
Happy Scrapping Everyone!
Other items used:
Cherry Lynn flourish die
Melissa Frances resin frame
Petaloo flowers - Canterbury Collection
Prima Cinderella vines
Imaginarium Designs chipboard fence
Martha Stewart edge punches and leaf punch
Tim Holtz mini bulldog clips
Basic Grey rubons
Donna Downey foam stamps
Monday, 12 December 2011
Hi Everyone! Merry Christmas to you all!
If you're like me and love altering, well anything :) you would always be on the hunt for something to revamp! In my scrap room I have a cupboard filled with quite a few alterable items, well more than a few if the truth be told hehe, but they do come in handy!
Maya Road Tins anyone? You know the ones, came out ages ago filled with chipboard items like arrows, flourishes stars etc. Well I still had a few that needed reinventing. This one Ive decorated with the scraps from my DT kit using Websters Pages Western Romance - such a lovely range, sigh.
To decorate the sides of the tin Ive cut straight strips of paper and then punched the edges with a Martha Stewart punch and then added some ribbon tape. On the top Ive done a triple bow with seam binding ribbon. On the front Ive used layers of paper cut using Spellbinders Picot Edge Circles and Labels Twenty Two. Ive also used the paper motifs as an embellishment, cutting the hat so that my 'letters' looks like they're tucked inside - Ive popped this whole thing up with foam tape, and then just added some flowers, cameo and a pin.
So there you go, quick and easy, did'nt take long at all and makes the perfect gift filled with some yummy treats.
Happy Scrapping!
Megan
If you're like me and love altering, well anything :) you would always be on the hunt for something to revamp! In my scrap room I have a cupboard filled with quite a few alterable items, well more than a few if the truth be told hehe, but they do come in handy!
Maya Road Tins anyone? You know the ones, came out ages ago filled with chipboard items like arrows, flourishes stars etc. Well I still had a few that needed reinventing. This one Ive decorated with the scraps from my DT kit using Websters Pages Western Romance - such a lovely range, sigh.
To decorate the sides of the tin Ive cut straight strips of paper and then punched the edges with a Martha Stewart punch and then added some ribbon tape. On the top Ive done a triple bow with seam binding ribbon. On the front Ive used layers of paper cut using Spellbinders Picot Edge Circles and Labels Twenty Two. Ive also used the paper motifs as an embellishment, cutting the hat so that my 'letters' looks like they're tucked inside - Ive popped this whole thing up with foam tape, and then just added some flowers, cameo and a pin.
So there you go, quick and easy, did'nt take long at all and makes the perfect gift filled with some yummy treats.
Happy Scrapping!
Megan
Wednesday, 23 November 2011
Design Team Inspiration - Pink Paislee Vintage Vogue
It is time for another DT inspiration post!
This time I was lucky enough to receive some Pink Paislee Vintage Vogue goodness in my design kit. I really really really enjoyed working with these papers. One of my favourite parts of designing is getting to work with ranges that I wouldn't have normally picked out for myself.
Pink Paislee Vintage Vogue is full of yummy pinks, purples, sea foam greens and blacks which give your layouts a hint of glamour but still being fun and easy to work with. In Particular, Vintage Vogue works well for girls of all ages from wee little ones (like my Taylor) to the tweens and even BOM pages.
My first layout encompasses several of the patterned papers in several layers. I have used the reverse side of the Eau de Parfume to form the base of my layout. Used a die cut template (from some Prima Packaging) to make the layered parentheses shapes with the Corner Boutique and Dress Shop patterned papers and cut out the little shape at the bottom of this paper to use an embellishment.
Other products used: Ephemera, Prima Bling, Martha Stewart Butterfly Punch, Prima Cream Trim, Prima Butterfly, Scrapware Birdcage, Twine

Have a great day!
// Michelle
Pink Paislee Vintage Vogue is full of yummy pinks, purples, sea foam greens and blacks which give your layouts a hint of glamour but still being fun and easy to work with. In Particular, Vintage Vogue works well for girls of all ages from wee little ones (like my Taylor) to the tweens and even BOM pages.
My first layout encompasses several of the patterned papers in several layers. I have used the reverse side of the Eau de Parfume to form the base of my layout. Used a die cut template (from some Prima Packaging) to make the layered parentheses shapes with the Corner Boutique and Dress Shop patterned papers and cut out the little shape at the bottom of this paper to use an embellishment.
Other products used: Ephemera, Prima Bling, Martha Stewart Butterfly Punch, Prima Cream Trim, Prima Butterfly, Scrapware Birdcage, Twine
My second layout compasses more Vintage Vogue Ephemera which is great value at $7.90 for 112 different pieces, both sides of the Beauty Parlour patterned papers and left over pieces from the papers I used in my first layout.

I hope you have enjoyed my inspiration for today. I have just sent both of these layouts to the store so they should be up for display shortly if you want to see them in real life.
Have a great day!
// Michelle
Wednesday, 2 November 2011
Inspiration Wednesday with Francine- Crate Paper
Hi Ladies and welcome to Inspiration Wednesday. This week Adrienne gave me some of the Crate Paper- Portrait collection to create with. This range comes in a variety of colours from black and grey to yellow and soft green and reds- so it covers almost the whole colour spectrum! I designed 2 layouts with my kit - one that i will share today and one next week.
This first layout i decided to step out of my comfort zone a little and focus on the reds and greens- not colours that i traditionally would use but i was happy with the end result! I layered lots of the paper and by cutting out various squares and using the back sides of the papers too- you can get a multi' layered effect from just a couple of pieces of paper. I handcut some of the flowers from the flowery paper to use on my layout too and only added a few smaller flowers to bulk it up a little.
Martha Stewart Punch- Large Monarch Butterfly
Jillibean Soup- Chipboard Alphabeans- Newsprint
Elements Pearl Brads - Metallic
Pink Paislee Brown Paper
Martha Stewart Deep edge heart punch
Prima Red Flowers
Kaisercraft Chipboard Hinge
Crate paper Diecuts
Ticket
This first layout i decided to step out of my comfort zone a little and focus on the reds and greens- not colours that i traditionally would use but i was happy with the end result! I layered lots of the paper and by cutting out various squares and using the back sides of the papers too- you can get a multi' layered effect from just a couple of pieces of paper. I handcut some of the flowers from the flowery paper to use on my layout too and only added a few smaller flowers to bulk it up a little.
By adding some punched edges and some punched butterflies ( how do i love thee Martha Stewart) and a few other embellishments it added to the texture and visuals of the layout. I hope that you will give this range a try - it would be great for both boy and girl layouts- vintage layouts too- something for everyone!
I'll be back with yellow- a colour that most people avoid and black next week- to show you how you can create something simple and striking with these colours and this range.
Happy Scrapping
Francine
Products Used
Jillibean Soup- Chipboard Alphabeans- Newsprint
Elements Pearl Brads - Metallic
Pink Paislee Brown Paper
Martha Stewart Deep edge heart punch
Prima Red Flowers
Kaisercraft Chipboard Hinge
Crate paper Diecuts
Ticket
Wednesday, 26 October 2011
Inspiration Wednesday - Melissa Frances - Part 2
Hi Ladies and welcome to Inspiration Wednesday. I have another layout to share using the beautiful soft colours of the 5th Avenue line by Melissa Frances. This range is beautifully soft and would be great for baby photos as it has both pink , blue and soft green elements- as well as both girl and boy layouts. This range has stunning embellishments that make creating not only fun but easy as well.
This layout shows my third daughter in a common activity at the moment - busy scribbling or drawing in her notebooks- she is almost ready for school and it is neat to see her start to take an interest in writing!
Here is my layout
This layout shows my third daughter in a common activity at the moment - busy scribbling or drawing in her notebooks- she is almost ready for school and it is neat to see her start to take an interest in writing!
Here is my layout
I am in love with these gorgeous Spellbinder dies that help you to create stunning flowers from your left over papers! The Websters trim is nice and pink and sparkly and the mistables are easy to glimmermist in the right shade for your layout !
I hope that you will have a play with some of these papers and products!
Happy Scrapping
Francine
Products Used
Spellbinders Die
Doily
Silver thread
Subscribe to:
Posts (Atom)