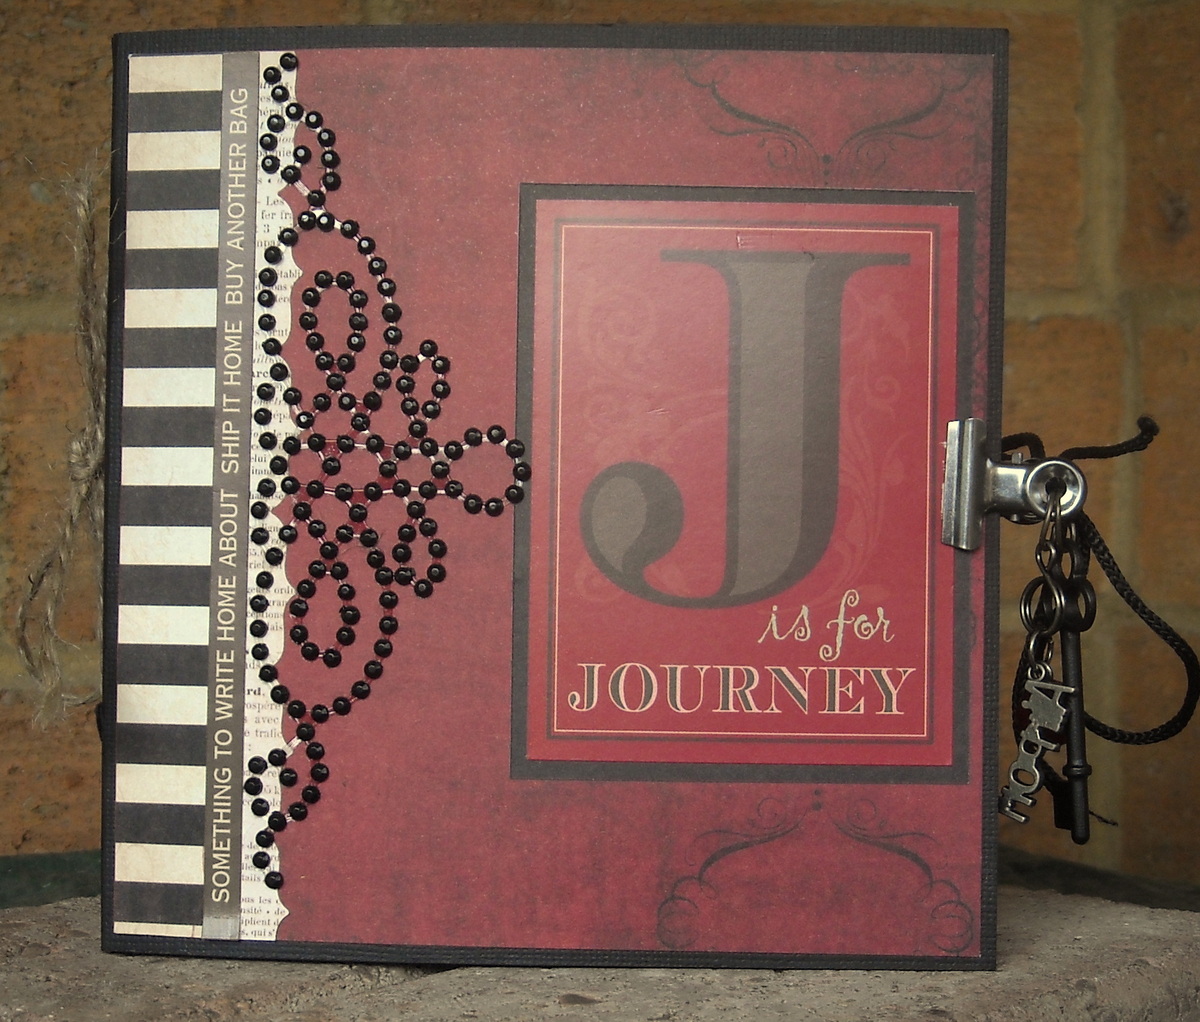
Hi Everyone!
Today I have something distinctly unfeminine to show you, not my usual style and its very bright so get your sunglasses out :)
Not that long ago BoBunny brought out a really bright funky boys range of paper called On the Go! It is full of bright oranges, yellows, greens and blues, with trains, planes and automobiles decorating it. Absolutely perfect for the car crazy boys in our lives :)
I was asked at work if I could make something for a former colleague of ours who had just had an awful time giving birth to her little boy at 29 weeks. Thankfully both he and his mum are doing really well but it made me really want to not do the wooden letter that was suggested but go a bit further. Instead of one letter I decided to do his whole name - Alex.
I needed slightly smaller letters than usual and found some at Warehouse Stationary, and the canvas as well, which 10 x 30". I've painted along the edges of the letters with gesso. Once I had adhered the paper, I inked the edges with pinecone ink - I spyed a new supply of these when I was in the shop yesterday ;)
Ive used three sheets of paper and a few of the chipboard stickers for decoration, and some old BG buttons.
With every range BoBunny puts out they always have one sheet of paper with four different designs on it. Usually I cut that up for cards but this time I thought it was time to try some else, so that is how I created the background, - four squares turned on the angle - so simple but pretty effective. You could also cut around the outside of the inner border of each square and distress along both edges for a completely different look, before putting them back together again.
Thanks for popping by!
Megan
Showing posts with label Megan Gourlay. Show all posts
Saturday, 26 January 2013
Thursday, 17 January 2013
Using Websters Pages fabric ribbon
Hi everyone!
I hope your new year has started off well. Already we are half way through January - time is certainly flying by! I think my mojo flew with it, I have had none for about six weeks now which has been very frustrating :( then finally I had some inspiration!
My DT kit this month included some Websters Pages. I love Websters about as much as I love Prima and Graphic 45 so this was a great kit! I was wanting to create something different with the fabric ribbon and inspiration didn't hit until Monday afternoon, and then I had to rope in my bff to help. I decided to decorate a plain calico apron I'd had for some time in my OTP stash, but I can't sew for the life of me - I certainly didn't pick up mothers creative prowess in that department :) so thank heavens Rebecca lives just round the road from me!
Fabric ribbon comes in a pack with 5 different designs each 18" long. I took two of them, the blue script and the floral strip, cut them in half to create a long piece and sewed two of the ends together, creating a length of 36" which we then gathered. The blue was sewn on top of the apron and the floral was sewn on underneath with a layer of gathered tulle in between.
I've then embellished the pocket with a mixture old Prima flowers from my stash, BoBunny flowers, and even one from the accessory shop Diva. I've also grabbed a Prima mask and used paint to dab the design on. The same goes for 'create' - this was a very old foam alphabet stamp with paint. The trick to using paint on fabric is once its dry, to heat set it with an iron.
And yes after I'd finished I then decided to pop in some Websters pins :)
So there you have it - something a bit different with fabric ribbon instead of only using them for layouts - I wonder if I've converted anyone over to the dark side of OTP with this project ;)
Thanks for dropping by and may the power of mojo be with you :)
Megan
Monday, 26 November 2012
OTP Inspiration
Hi everyone!
In last months newsletter I had promised to share a mini album I had made using Pink Paislee Portfolio range. Im sorry but it slipped my mind :( , so here it is today.
My sister was given for her birthday a voucher from all her friends to bungy jump in Queenstown. Probably not what most of us would love for our birthdays lol but she was stoked with it, and off she went for a girlie weekend away with some friends. She asked me when she came back if I would make her a mini album to keep the photos in, but there were rules to go with it! No flowers! At all!! If you know me, you would know that was going to be challenge lol I even asked at one stage during the process if I could put some in but no amount of pleading helped, so I had to stop whinging and get on with it! Here it is:
I have cut up the portfolio packet the photos came in to use for my title and front page embellishments. The cover is also randomly stamped over the top of a hexagon stencil from WOW - I toned down the yellow Glimmermist with white tissue paper. Ive also thrown in leftover bits and pieces from Kaisercrafts Pack Your Bags collection - yes thats quite old! :)
I was pleasantly surprised by just how versatile this paper range became, it also came in very handy for covering notebooks, and diaries for a portfolio Ive put together for my husband for Christmas which Ive stored in a Heidi Swapp Memory Box - theres some of these still in the shop. Ive used mine to pop all my husbands car photo expeditions in, using the portfolios, brilliant space saver!
The idea for the type of album Ive made has come from an album Heidi did. The pattern is purchased from Paper Phenomenon, its an awesome site of great patterns for OTP! Go check it out.
Happy Scrapping Everyone!
Megan
In last months newsletter I had promised to share a mini album I had made using Pink Paislee Portfolio range. Im sorry but it slipped my mind :( , so here it is today.
My sister was given for her birthday a voucher from all her friends to bungy jump in Queenstown. Probably not what most of us would love for our birthdays lol but she was stoked with it, and off she went for a girlie weekend away with some friends. She asked me when she came back if I would make her a mini album to keep the photos in, but there were rules to go with it! No flowers! At all!! If you know me, you would know that was going to be challenge lol I even asked at one stage during the process if I could put some in but no amount of pleading helped, so I had to stop whinging and get on with it! Here it is:
I have cut up the portfolio packet the photos came in to use for my title and front page embellishments. The cover is also randomly stamped over the top of a hexagon stencil from WOW - I toned down the yellow Glimmermist with white tissue paper. Ive also thrown in leftover bits and pieces from Kaisercrafts Pack Your Bags collection - yes thats quite old! :)
I was pleasantly surprised by just how versatile this paper range became, it also came in very handy for covering notebooks, and diaries for a portfolio Ive put together for my husband for Christmas which Ive stored in a Heidi Swapp Memory Box - theres some of these still in the shop. Ive used mine to pop all my husbands car photo expeditions in, using the portfolios, brilliant space saver!
The idea for the type of album Ive made has come from an album Heidi did. The pattern is purchased from Paper Phenomenon, its an awesome site of great patterns for OTP! Go check it out.
Happy Scrapping Everyone!
Megan
Thursday, 1 November 2012
November Sketch
Hi Everyone!
My turn to provide the sketch for this months challenge :) So this time I have chosen to use one of Trina McClune's gorgeous sketches to inspire you!
Heres my take on the sketch.
I have used an old Heidi Swapp mask to create my heart shape, and used three different inks to colour it, then randomly stamped around the outside and the inside. My chipboard word is inked with embossing ink and then heat set with white, and then bronze embossing powders. The photo is my husband, the little cutie :) on his first day of school with his sister.
If you love this sketch, you'll find more superdooper ones on Trina's blog - trinamcclune.typepad.com
Please have your sketch uploaded below to the gallery by midnight November 30th to be into win! The winner will be picked by our lovely Trina :)
Products used:
Prima En Francais paper, flowers and chipboard embellishments
Imaginarium Designs chipboard word
Tim Holtz Distress Ink - Aged Mahogany, Walnut stain, and Stormy Sky
Darkroom Door stamps
Cherry Lynn leaf dies
Prima metal fence and wooden banner
Other stamps from Kaisercraft and Pink Paislee
My turn to provide the sketch for this months challenge :) So this time I have chosen to use one of Trina McClune's gorgeous sketches to inspire you!
Heres my take on the sketch.
I have used an old Heidi Swapp mask to create my heart shape, and used three different inks to colour it, then randomly stamped around the outside and the inside. My chipboard word is inked with embossing ink and then heat set with white, and then bronze embossing powders. The photo is my husband, the little cutie :) on his first day of school with his sister.
If you love this sketch, you'll find more superdooper ones on Trina's blog - trinamcclune.typepad.com
Please have your sketch uploaded below to the gallery by midnight November 30th to be into win! The winner will be picked by our lovely Trina :)
Products used:
Prima En Francais paper, flowers and chipboard embellishments
Imaginarium Designs chipboard word
Tim Holtz Distress Ink - Aged Mahogany, Walnut stain, and Stormy Sky
Darkroom Door stamps
Cherry Lynn leaf dies
Prima metal fence and wooden banner
Other stamps from Kaisercraft and Pink Paislee
Thursday, 11 October 2012
Smash Books!
Hi Everyone :)
Spring has definitely been here at last :) Ive been loving these sunny days with a gentle norwest wind and all the flowers beginning to bloom again - definitely my favourite time of year!
I was thinking about that while deciding what to do with my latest DT kit, and ended up channelling those spring, flowery days. Smash books and me don't really connect, I wondered what all the hype was really. Im not into ecletic, artsy styles, Im a bit too anal for that :) well I thought I was til I started this album, but I'll let you decide :) While I was deciding what to do with my smash album I did a bit of net surfing and came across a host of ideas and discovered just how different they can be, even for those of you as anal as me! :)
Whenever I start an album I have to do the cover first, and I can't seem to move forward until its completed. I thought I'd have a go at trying something a bit different, and use some of the techniques I'd learned at retreat with Cindy Porter. I had also come across a technique I had come across Janine Kocswara's blog and wanted to give that a try too - my plan is to incorporate that into the book as I go.
But firstly I needed a theme! The album itself is a travel album, but by the time I'd finished with the cover you would never know, so I thought I'd make it an album about me, about all my little quirks, the things that interest me, things I love, and things that I don't like - you get the picture :)
So heres my front cover. I used mod podge as my sealer/adhesive for the base, adhering 7Gypsies tissue paper on first, and then separating a paper napkin and layering random pieces of it on top, then sealing the lot. This was Janine's technique :) I love how the napkin looks like its part of the tissue paper design! On top of that I used a Prima mask and texture paste and when dry inked over the design in black archival ink. I then just organised the items I wanted to use to decorate the front, and sprayed Glimmermist over the whole lot, and inked the edges with Tim Holtz Distress Ink.
The key word for me here is BELIEVE which is on the wooden ticket. Because Im not much of a believer in my abilities, and Im not just talking about scrapping - Ive been told Im like a caramello, hard on the outside and soft and squishy in the middle :) So for me this book will all about trying to believe.
And a few closeups :)
Each time I post on the blog I'll be showing you the next lot of pages Ive done, and share what techniques Ive used to create them. I hope you join me along the way, and share your thoughts :)
Products Used:
Prima Mask
Tim Holtz Distress Ink Walnut stain
Lily Pad Glimmermist
Peacock Glimmermist Chalkboard
7Gypsys Tissue Paper
Prima Flowers - Soubrette
Prima Wooden buttons and Tickets
Melissa Frances Resin Frame
Prima En Francais chipboard stickers
7Gypsys Gaffer Tape
Spring has definitely been here at last :) Ive been loving these sunny days with a gentle norwest wind and all the flowers beginning to bloom again - definitely my favourite time of year!
I was thinking about that while deciding what to do with my latest DT kit, and ended up channelling those spring, flowery days. Smash books and me don't really connect, I wondered what all the hype was really. Im not into ecletic, artsy styles, Im a bit too anal for that :) well I thought I was til I started this album, but I'll let you decide :) While I was deciding what to do with my smash album I did a bit of net surfing and came across a host of ideas and discovered just how different they can be, even for those of you as anal as me! :)
Whenever I start an album I have to do the cover first, and I can't seem to move forward until its completed. I thought I'd have a go at trying something a bit different, and use some of the techniques I'd learned at retreat with Cindy Porter. I had also come across a technique I had come across Janine Kocswara's blog and wanted to give that a try too - my plan is to incorporate that into the book as I go.
But firstly I needed a theme! The album itself is a travel album, but by the time I'd finished with the cover you would never know, so I thought I'd make it an album about me, about all my little quirks, the things that interest me, things I love, and things that I don't like - you get the picture :)
So heres my front cover. I used mod podge as my sealer/adhesive for the base, adhering 7Gypsies tissue paper on first, and then separating a paper napkin and layering random pieces of it on top, then sealing the lot. This was Janine's technique :) I love how the napkin looks like its part of the tissue paper design! On top of that I used a Prima mask and texture paste and when dry inked over the design in black archival ink. I then just organised the items I wanted to use to decorate the front, and sprayed Glimmermist over the whole lot, and inked the edges with Tim Holtz Distress Ink.
The key word for me here is BELIEVE which is on the wooden ticket. Because Im not much of a believer in my abilities, and Im not just talking about scrapping - Ive been told Im like a caramello, hard on the outside and soft and squishy in the middle :) So for me this book will all about trying to believe.
And a few closeups :)
Each time I post on the blog I'll be showing you the next lot of pages Ive done, and share what techniques Ive used to create them. I hope you join me along the way, and share your thoughts :)
Products Used:
Prima Mask
Tim Holtz Distress Ink Walnut stain
Lily Pad Glimmermist
Peacock Glimmermist Chalkboard
7Gypsys Tissue Paper
Prima Flowers - Soubrette
Prima Wooden buttons and Tickets
Melissa Frances Resin Frame
Prima En Francais chipboard stickers
7Gypsys Gaffer Tape
Monday, 17 September 2012
6 x 6 paper pads
Hi Everyone,
Please be aware this is post is very photo heavy! :)
My Dt kit included a 6 x 6 paper pad. Usually I use these to make cards, they're really easy and quick to use for cards but I wanted to do something different. This time I decided to make a mini album out of paper bags, and use the paper pad as my starting point.
My paper bags are 10.5in x 5in when folded flat; to make the pages just layer the flattened bags on top of each other and fold in half, and you have pages that are 5 x 5inches. To make the cover just take a piece of cardstock 12 x 6inches and find the point in the middle where you can score two vertical lines 1/4 of an inch apart - this creates the spine of the album.
This is the first of my examples - yes I have two for you, but each quite different.
The first album uses MME Lost and Found range. I focused on my friends OE, making this a mini album for one of her trips during her time in the UK. Ive left the bags open and added tags for journaling or photos.
The second album came out of the blue from Adrienne ;)- its a new range from Fancy Pants called Boutique Garden. Its quite different and not my usual taste, shall we say :) but is'nt that half the challenge? This pad has two possibilities either masculine with ranges of greys and beige or feminine with ranges of lavendar and white. So what to do?!!
I came up both lol! I made an album that could cater to both and a card that was distinctly feminine.
After a weekend at retreat I came home and made the cover for this album and channelled my inner Cindy Porter :)) using paint, texture paste, inking, and stamping.
And this is the card...................
So there you have it :) Thanks for popping by!
Megan
Please be aware this is post is very photo heavy! :)
My Dt kit included a 6 x 6 paper pad. Usually I use these to make cards, they're really easy and quick to use for cards but I wanted to do something different. This time I decided to make a mini album out of paper bags, and use the paper pad as my starting point.
My paper bags are 10.5in x 5in when folded flat; to make the pages just layer the flattened bags on top of each other and fold in half, and you have pages that are 5 x 5inches. To make the cover just take a piece of cardstock 12 x 6inches and find the point in the middle where you can score two vertical lines 1/4 of an inch apart - this creates the spine of the album.
This is the first of my examples - yes I have two for you, but each quite different.
The first album uses MME Lost and Found range. I focused on my friends OE, making this a mini album for one of her trips during her time in the UK. Ive left the bags open and added tags for journaling or photos.
The second album came out of the blue from Adrienne ;)- its a new range from Fancy Pants called Boutique Garden. Its quite different and not my usual taste, shall we say :) but is'nt that half the challenge? This pad has two possibilities either masculine with ranges of greys and beige or feminine with ranges of lavendar and white. So what to do?!!
I came up both lol! I made an album that could cater to both and a card that was distinctly feminine.
After a weekend at retreat I came home and made the cover for this album and channelled my inner Cindy Porter :)) using paint, texture paste, inking, and stamping.
And this is the card...................
So there you have it :) Thanks for popping by!
Megan
Labels:
Cards,
Fancy Pants Designs,
Megan Gourlay,
mini books,
otp design team
Saturday, 14 July 2012
A month of Basic Grey - Part 2
Hi Everyone!
Well, this time I thought I'd do something quite different and not something Ive done before, so it was a bit of an experiment. Throw in that I wanted to something for a little boy and it became more than a little challenging, after all you know what me and flowers are like :)
The reason for the boy theme was because Im about to become, well in October anyway, a Great Aunt! An aunt would be fine, but heavens a great aunt sounds so old! My niece is in her mid twenties and its all exciting, so I have been thinking of decorating babys' room ideas. Actually I was thinking of lovely girly things, and then he turned into a boy! So, I got thinking a bit more and decided to turn my lovely bright Picadilly orange papers into a lampshade.
I purchased an ordinary touch lamp with a plain canvas lamp shade in a sale, and set about turning it into something a bit more interesting.
So how did we get to this point? Easy peasy. Decide what theme you want first - I chose stars - and then randomly diecut a mixture of sizes and colours.
Then its just a matter of playing with placement....................................................
Once I was happy with placement, they needed something else, so I added buttons and twine for finishing touches, and it was done!
Well, this time I thought I'd do something quite different and not something Ive done before, so it was a bit of an experiment. Throw in that I wanted to something for a little boy and it became more than a little challenging, after all you know what me and flowers are like :)
The reason for the boy theme was because Im about to become, well in October anyway, a Great Aunt! An aunt would be fine, but heavens a great aunt sounds so old! My niece is in her mid twenties and its all exciting, so I have been thinking of decorating babys' room ideas. Actually I was thinking of lovely girly things, and then he turned into a boy! So, I got thinking a bit more and decided to turn my lovely bright Picadilly orange papers into a lampshade.
I purchased an ordinary touch lamp with a plain canvas lamp shade in a sale, and set about turning it into something a bit more interesting.
So how did we get to this point? Easy peasy. Decide what theme you want first - I chose stars - and then randomly diecut a mixture of sizes and colours.
Then its just a matter of playing with placement....................................................
Once I was happy with placement, they needed something else, so I added buttons and twine for finishing touches, and it was done!
The paper I used was still part of the Picadilly range, specifically Eat at Jones, Eggs & Bacon, and Farm Fresh Eggs, with a piece of Bazzill cardstock. The buttons were from the range too.
Thanks for stopping by!
Megan
Thursday, 21 June 2012
OTP Inspiration
Hi Everyone!
I thought I would show you something today, that some of you might not be aware of in the shop that is available for purchase. Adrienne has an Accucut diecutting machine and whole lot of different dies for it. She has a variety of shapes and styles for you to pick through, so I thought I'd show you some of my favourites. You can see some of them here. I decided to make a mini album, so I chose some of the rectangular dies with funky edges - tabs scallops and bracket shapes.
On the front cover I used a smaller piece with a window precut out of it. Popped a piece of transparency behind and added a rubon quote to it, tied some tulle on the rings and added a Prima flower from my stash.
I have also used the same range of paper throughout the album Prima's Pixie Glen - its just the cutest range of paper for babies and it went perfect with my theme, and theres still some in the shop!
So, meet little Indie Grace, is'nt she just the cutest :)
I wanted this album to show some different techniques as well, so Ive altered metal with paint, used texture paste on Primas gate stencil, and I also went into my stash of rubons and rubbed onto transparencies and ribbon.
These next two pages are my favourites combining texture paste and altering Tim Holtz's metal angel wings with paint. Ive also used Vintaj metal embellishments, but left these as they were - theres quite a variety of these in shop.
The best thing about these albums is that once you decide which pages you want Adrienne can then cut the patterned paper you want too, so you have a perfect fit without having to cut and sand back - saves a lot of time! You can also have square pages as well! Go check it out - I'd love to see how you go :) In the meantime, this will be in the shop on Friday for you to have a look at it.
Happy Scrapping!
Megan
I thought I would show you something today, that some of you might not be aware of in the shop that is available for purchase. Adrienne has an Accucut diecutting machine and whole lot of different dies for it. She has a variety of shapes and styles for you to pick through, so I thought I'd show you some of my favourites. You can see some of them here. I decided to make a mini album, so I chose some of the rectangular dies with funky edges - tabs scallops and bracket shapes.
On the front cover I used a smaller piece with a window precut out of it. Popped a piece of transparency behind and added a rubon quote to it, tied some tulle on the rings and added a Prima flower from my stash.
I have also used the same range of paper throughout the album Prima's Pixie Glen - its just the cutest range of paper for babies and it went perfect with my theme, and theres still some in the shop!
So, meet little Indie Grace, is'nt she just the cutest :)
I wanted this album to show some different techniques as well, so Ive altered metal with paint, used texture paste on Primas gate stencil, and I also went into my stash of rubons and rubbed onto transparencies and ribbon.
These next two pages are my favourites combining texture paste and altering Tim Holtz's metal angel wings with paint. Ive also used Vintaj metal embellishments, but left these as they were - theres quite a variety of these in shop.
The best thing about these albums is that once you decide which pages you want Adrienne can then cut the patterned paper you want too, so you have a perfect fit without having to cut and sand back - saves a lot of time! You can also have square pages as well! Go check it out - I'd love to see how you go :) In the meantime, this will be in the shop on Friday for you to have a look at it.
Happy Scrapping!
Megan
Subscribe to:
Posts (Atom)