Showing posts with label Bazzill Cardstock. Show all posts

Tuesday, 18 September 2012

9 to 5 by October Afternoon with Trace...

I can never resist buying October Afternoon products! Look at the fabulous colours in this range, it works just as well with modern and funky as it does with shabby chic and vintage.
I find the label stickers that OA produce, such handy embellishments to have on hand. While more often than not, I use them for their intended purpose of journalling, they also work well if I think I need something a bit extra when wanting to add depth and layers to a layout.
Scrappin Patch make it really easy by having bakers twine and buttons that work beautifully with this range, along with many others.
To do this layout I started with a Crafters Workshop Template, while I chose a chevron pattern, there are many to choose from that would work just as well. I mixed a bit of Glimmermist with gel medium, as I love the texture that this adds to a layout.
Products I used on this layout were:
Steno Pad
Italics
Meeting Minutes
Label Stickers
Pink Paislee Alphas
Buttons and Bakers twine
XX Trace

Thursday, 6 September 2012

LYB Saturday's Kit - Part 1

Hi, it's Jessica T back with you today.
Over the last couple of weeks I have had the pleasure of playing with one of the new Page Kits that Scrappin' Patch offers through their shop. The kit I am showing you today is made using the Little Yellow Bicycle Saturdays collection patterned papers, cardstock stickers, chipboard spinner, journalling cards, brads, burlap type ribbon, and some Bazzill.
I created four layouts, and there is still more product left over. I will show you two today, and another two next time.
For my first layout, I absolutely fell in love with one of the pieces of patterned paper and couldn't bring myself to cut it up, so I used it as my background piece and built my layout on top. The paper wasn't bright but it was still busy so I kept my embellishing to a minimum so it didn't distract from the photo.
The only thing I used that wasn't included in the kit (other than adhesive and pens), were the brown mini alphas.
I found the centre of the cardstock sticker to be too bright for my layout, so I layered it with two more of the stickers.
My second layout for today is a completely different look, although still in my style of clean and simple. It is created on a half and half background of plain Bazzill and patterned paper.

To be honest it would've been easier using smaller hexagons, but if they were smaller you wouldn't have been able to see the full context of the photos. Play around until you find a size that is right for you.


Again I layered the stickers.
I adhered the photos with foam tape.
I thought this sentiment was perfect for these photos, as I'm sure my partner had plenty of more 'important' things to get done.
I hope this has brought you some inspiration, and that you will buy this kit. Kits really are a great way to get product, as it all matches, and they're usually cheaper than buying the components separately.
Next weekend I will have the next two layouts from this kit to show you.

Thursday, 7 June 2012

DT Inspiration

Hi everyone!

Today I'm showing you a couple of cute cards for boys using the Best Creation Inc Robot range.

My first card is quite simple and easy to make but still very effective with its geometric shapes. I wanted to use squares to show off a selection of the patterns within this range. To soften the look a little I put a vellum circle over the squares. I finished the look with more circular shapes showing off the number 5 and a strip of green ribbon to tie all the colours in.


My second card features this gorgeous wee robot I found lurking in one of my craft drawers. Unfortunately he's not part of the Robot range but there are still plenty of other robots to choose from within that range. Since this guy is so cute I wanted to make him the focus so I just built the card around him using a rocket journalling piece from the range, some banner detail and a bit of black twine.


Hope you enjoyed my inspiration for you today. Make sure you leave a comment, I love reading your feedback :)

x Lana

Products used: Best Creation Inc Robot,  Bazzill Cardstock, Tim Holtz Distressing Tool

Thursday, 31 May 2012

Cupcakes!

Hi everyone :)

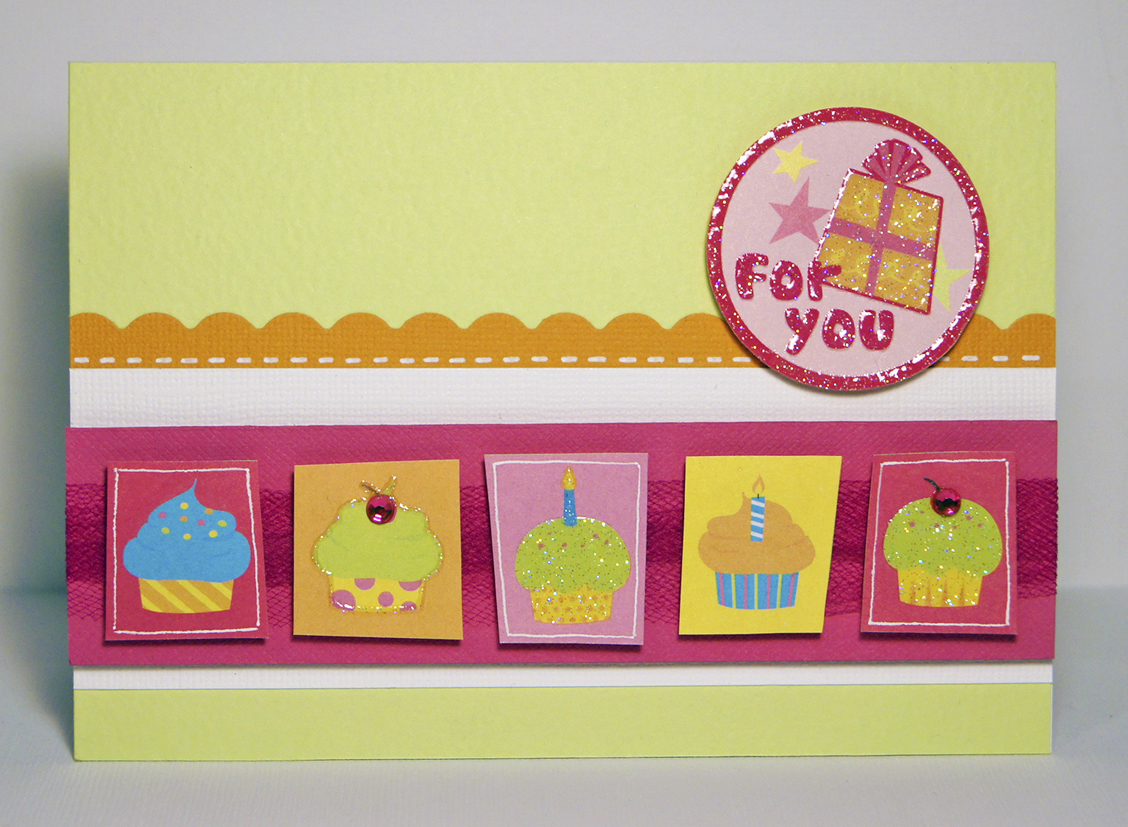
Today I'm sharing more of the Best Creation Inc's Let's Party range. I loooooove cupcakes, the look and taste! So I thought I'd make a couple of cute cupcake cards using some cupcake elements that can be found within this range.

My first card features a doilie background that I've sprayed with some Shimmerz Paints Coloringz in Pink Stiletto. This gave a nice texture to the base of my card. The main feature is of course the cupcake and I've finished that off with a button detail and the sentiment.


For my second card I cut out some cupcake shapes that be found on one of the Let's Party sheets. They're set on a green background on the sheet but I wanted to put them on pink girly strip. To make the pink cupcakes stand out from this I just added a simple white gel pen border. Then I added a couple of rhinestones for some extra bling :)


Thanks for stopping by! I hope this gave you some inspiration for your next card project :)

x Lana

Products used: Best Creation Inc Let's Party, Tulle, Doilie, Bazzill Cardstock, Shimmerz Paints Coloringz - Pink Stiletto

Thursday, 24 May 2012

DT Inspiration

Hi everyone!

How exciting is the Stars in their Eyes competition?! I'm loving all of the creations coming through. There's so much talent! You're all so inspiring :)

Well today I'm showing you another couple of cards made from the Best Creation Inc. Robot range. This range is seriously cute!

My first card is a window card, which is super easy to make - just cut a shape in your card and you're done! I chose to go with a circle cut-out to match the circular patterns from the planets. Now I didn't actually plan to add the extra red circles to the left of the window (my original sketch was completely different!). They were scraps from the main red border and another project. But I was just playing around with them and I ended up liking the positioning so ran with it. It's funny how projects take on a life of their own!


My second card was really quick to make - mainly because this range does a lot of the work for you with the glitter accents and journaling pieces. I wanted to create a bit of movement on the card and a sense of 'Blast off!' so I made a diagonal stripe pattern using the front and back of one sheet of paper then made it pop a little with some faux stitching. I'm really happy with how it came out :)


Now I can't rave about this collection enough so make sure you check it out here.

x Lana

Products used: Best Creation Inc Robot collection, Bazzill Cardstock, Tulle Butterfly, Tim Holtz Distress Marker - Picket Fence.

Monday, 14 May 2012

Step By Step - Birthday Card

Hi everyone :)

Today I'll be showing you how to make a bright and fun birthday card using the Let's Party range from Best Creation Inc. This range truly is colourful in every way and really screams celebration so it's a lot of fun to work with.

Step 1.

I used a striped pattern as my background and to give it a bit of interest I cut it into 4 equal strips. I love using multi-coloured backgrounds as it gives you a lot of colour options later on in your project - basically any colour combination you choose from the background will work - perfect!

Step 2.


I love making cute little candles out of paper and a bit of cotton or bakers twine. They're so easy! All you have to do is cut a square or rectangle and fix a piece of cotton so it sits at the top left or right corner, then start rolling them up with the cotton on the inside. A handy little tip is roll them around a thin paint brush or pencil to get them started as the first roll can be the tricky bit.

Step 3.

As this card is all about celebration I wanted to include a couple of little streamers. So I cut a few thin strips of paper in a few different colours then gave them a slight curl with some scissors (as you would with ribbon). When it comes to sticking these down and creating a streamer effect I fix the top of the streamer to some card then twist it around a few times and then fix the bottom. Easy as that! The Let's Party range also includes a pattern that features streamers, as shown on my previous post, so it's a nice little tie in :)

Step 4.

At the beginning of any card I only stick my background paper down and leave everything else loose so I can move things around and change colours etc. Here you will see I have all of my main components that I want to use.

Final product!

Everything is now fixed in place and the card is finished off with a sparkly sentiment from the Let's Party range. I also added tiny bit of glitter to the streamers for some extra sparkle. Another tip, because of the shape, when sticking the candles down I like to use a really strong adhesive like a hot glue gun so I know that they'll never fall off.

I hope this has given you some inspiration for your future birthday cards or layouts. Until next time :)

x Lana

Products used: Best Creation Inc Let's Party, Bazzill Cardstock, Kindy Glitz - Crystalina, Tim Holtz Distressing Tool, Tim Holtz Distress Marker - Picket Fence.


Thursday, 12 April 2012

Step By Step with Heidi

Morning Ladies, today I am going to share step-by-step instructions on a layout I've done using the Farmhouse range from October Afternoon.


Products required for this layout :
Instructions

1.  Cut the required papers to length as show in Step 1 and back all of them onto black 
     cardstock except for the Long Kitchen Cupboard piece.


 2.  Squirt a little black paint into a container, and add a little water to your black paint to make it 
       thinner, using your paint brush platter it into the white Bazzill Cardstock, to make the runs lift 
       the paper up and  let it run.  Allow to dry and then spray some Sunflower Glimmermist onto 
       the cardstock.


3.  Place the Guest Room paper down first, then the Sunday Dinner, and lastly the Attic Trunk.

 
 4.  Now place your photo down and then the strips of Kitchen Cupboard [long one] and the 
      Phonograph strip


5.  To make a little embellishment using your Tin Pin, take the Tin Pin and stick it down onto a 
      round journal sticker and then adhere the sticker onto black cardstock and cut around it,


 6.  Using some Adhesive [I have used Helmar 450 Quick Dry Adhesive which works really well 
      on fabric / ribbons / string], spread some in a line over the top Small Kitchen Cupboard strip 
      and then place your Jute String on top to adhere it - do this along the length of the string.


7.  Once you have glued the whole piece of string down, adhere your Tin Pin Embellishment 
     down - I have used a Foam Square to give this a little dimension.


8.  Now you can embellish the rest of the page using your element sticker sheet as well as the 
     Word Sticker sheet.  To add a little extra oomph to the stickers, back some of the Words onto
     black cardstock and then pop them up using foam tape or foam square.


     A little tip, once you have placed your sticker down, using a black marker or pen go 
     around the edge the sticker to give it a finished look.

9. Using your clear piece of transparency adhere your Title onto the Transparency and cut 
    around the title - now you can play around to see where you want to place your title - once you 
    know where you want to put it, adhere the transparency down with glue dots or double 
    sided tape.

 Your layout is now complete, I hope you have enjoyed creating it and have learned some new techniques.

Heidi

Monday, 12 March 2012

DT Inspiration

Hi everyone!

Today's inspiration post is my last creation using Echo Park's Yours Truly collection. I have absolutely loved this range. It has provided endless inspiration for myself and it's even better that each page is double-sided, giving you a great range of beautiful patterns to play with.

The title itself lends itself to lovey creations so I've created another card that would be suitable for someone special and even a wedding.


I used a swirly background pattern and complemented that with a lot of circular shapes including a doilie which I think adds a touch of elegance to an otherwise modern design. For a bit of added texture and balance I used a strip of grey satin ribbon which also adds to the elegance.

I've kept the colour palette quite muted apart from a pop of colour in the centre highlighting the rosette. I was going to include a sentiment but I thought the heart in the centre said it all :)


I hope this provides you with some inspiration for your next special card or project.

X Lana

Products used: Echo Park 'Yours Truly' Collection, Doilie, Ribbon, Bazzill Cardstock, Tim Holtz Rossette Die.

Thursday, 1 March 2012

March Sketch Challenge


Hi Everyone,

Its my turn for the sketch challenge this month, and I chose to use a sketch from Monika at monma.blogspot.com
Monika does some amazing sketches and you can see the rest of them on her blog by clicking on the link at the top of the home page, on her blog.  She also happens to be the owner of one of Swedens biggest online forums Allt om Scrap.


Megan's Layout


I loved the simplicity of the layout too and you get to add layers without making looking too overloaded.  Ive been a tad predictable :) and used my favourite papers from Prima Printery range and some flowers from my stash, and a  Dusty Attic clock face.  The metal clock face is Tim's and Ive turned the clock hands to the time the quake struck.  This photo was taken on top of the Port Hills by someone else - I found it on Rise Up Christchurch facebook page.

Belinda's Layout


Hi Girls, this layout I really enjoyed as though it is a simple design, there is a lot of room to make it your own. For this I have embraced the Amy Tangerine range that Adrienne has in, it is so funky! Using white Bazzil as my base, then a scrap of Pink Paislee Vintage Moon distressed on top for contrast, I then layered Amy Tangerine Fabric Paper at the top and bottom of my photo. Using Amy Tangerine Wishing and All Together Stickers to embellish along with Amy Tangerine Hello Thickers for my title... fun eh!!


Hope you all enjoy the sketch and Im looking forward to see what you come up with!
Happy scrapping!
Megan

Tuesday, 20 December 2011

Step By Step with Francine-

Hi everyone,

I hope that everyone is feeling the Christmas spirit and has finished all their shopping and looking forward to a nice break with family and friends.

This is my last post as a designer at Scrappin Patch and i just wanted to say a big thank you to Adrienne for choosing me to be on the team. I have thoroughly enjoyed my year and a half on the team - to all my fellow design team members both past and present thank you too for your support and encouragement. Next year promises to be a big one with 2 retreats and i know that Adrienne has lots of awesome things planned. The new design team will be sure to inspire and challenge you!

As part of my design team pack - i received a Basic Grey doily in a 12 by 12 size. I wanted to show you something different that you could try on a layout using one of these. i decided to cut it up into strips as each strip has a different pattern on it and then layer it on my page and then glimmermist it to create a funky background.


Glimmermisted in 3 colours

you get this cool effect

My finished layout with the glimmermisted background using the doily

some close ups

another close up
So before i sign off- i would like to wish everyone of you a Merry Christmas and Happy New Year- may 2012 be one of your best ever years!

Over and out

Francine

LinkWithin

Related Posts Plugin for WordPress, Blogger...